Showing posts with label hybrid. Show all posts

November 25, 2013

Winnie & Walter: The Daily Grind Collection Vol. 1

Hello!  Long time no blogging.  I have a very good reason....

It's official!  Winnie & Walter is live and we have a collection on sale, newsletter freebie + coupon, Facebook Freebie and also a giveaway of the entire collection on the Winnie & Walter blog.  Don't miss out if you love digital or hybrid crafting!

I love how versatile our The Daily Grind Collection Vol. 1 is...believe it or not we designed it to be that way!  For the little moments or those special occasions, this collection has it all.  Plus it works with what you already have at home or on your computer! 

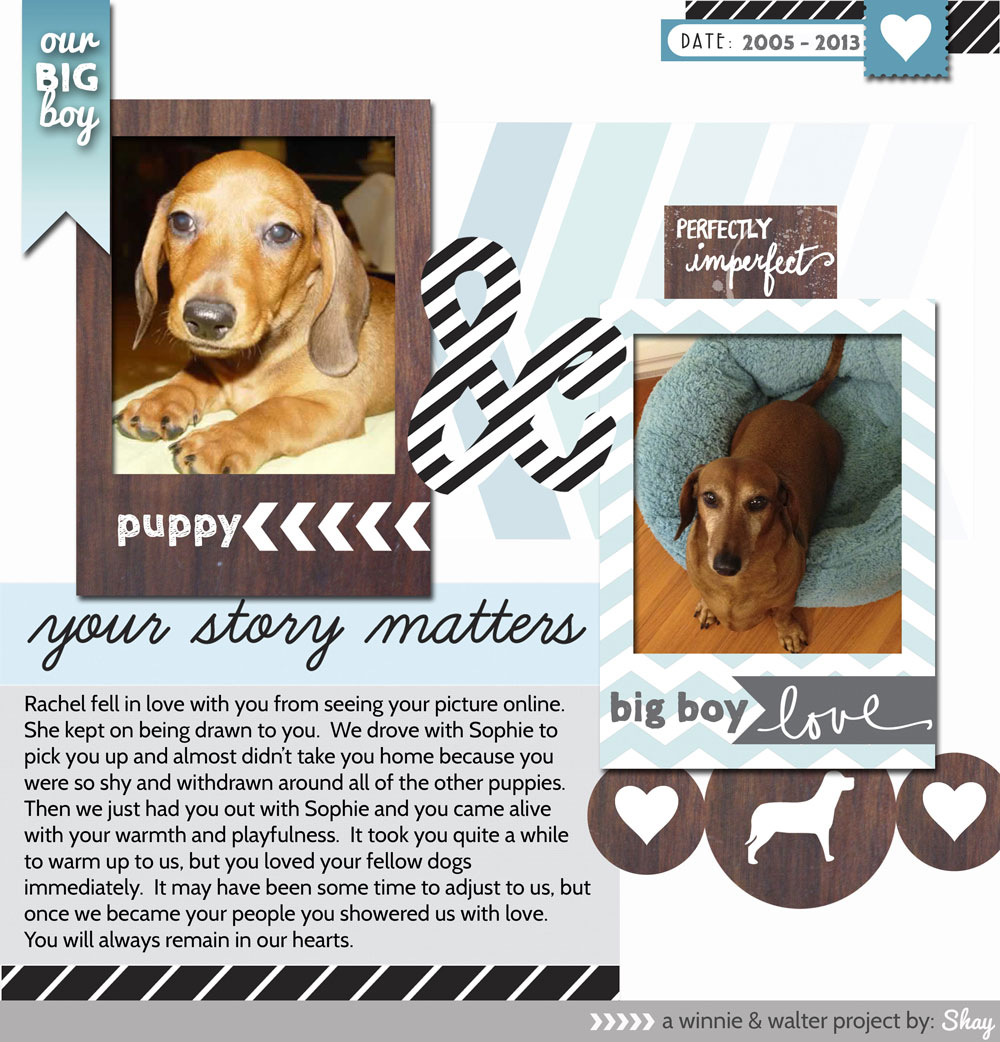
I made a few items with The Daily Grind Collection Vol. 1 including my first digital layout!
dgcv1c
 
I had a lot of fun along with some tearing of the eyes (Lordy, those puppy paws get me every time!)playing with the elements, journaling cards, wood grain icons and even a little of the papers to create this layout.   
 
After the digital layout I went back to making cards.  I really wanted to make some cards using some of the awesome stamps I have been receiving from Studio Calico in kits and otherwise.
 
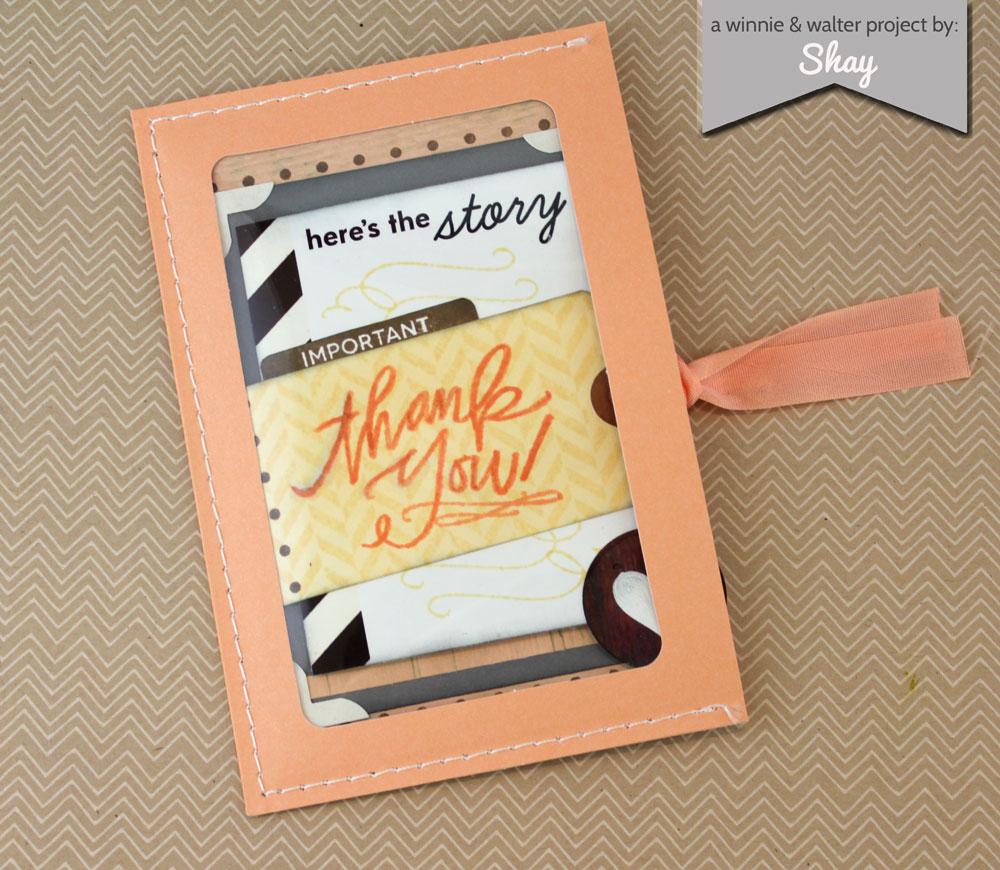
For the first card I was inspired by one of Julie Campbell's cards she made for Two Peas in a Bucket using a pocket by Studio Calico.
 
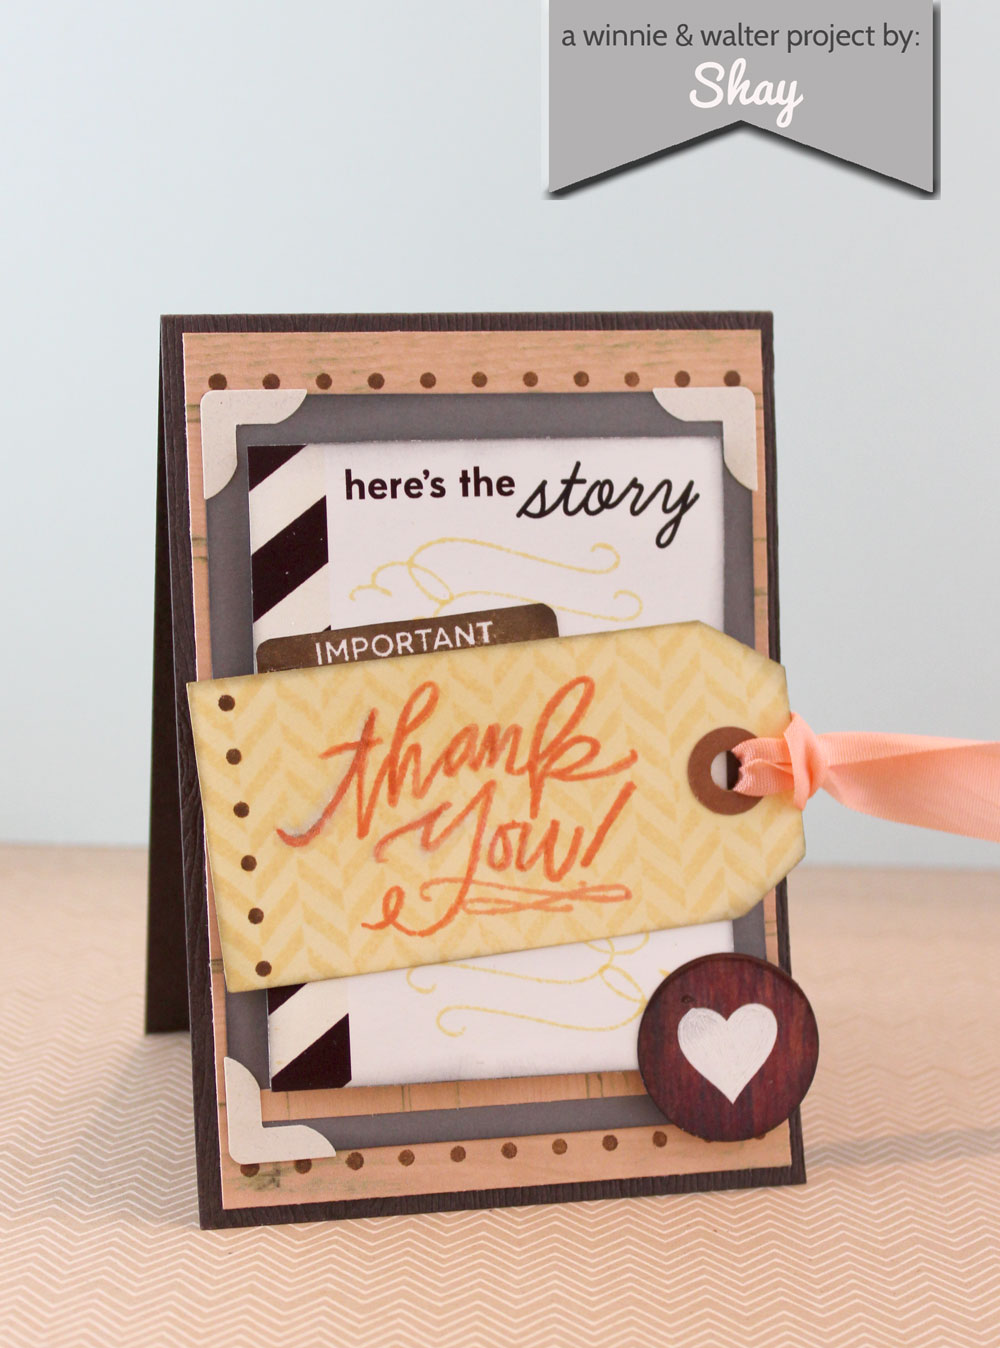
Using the Cuppa card kit I chose a pretty soft apricot to pair with the deep wood grain, vanilla and pewter grey.  
 

dgcv1b

dgcv1a

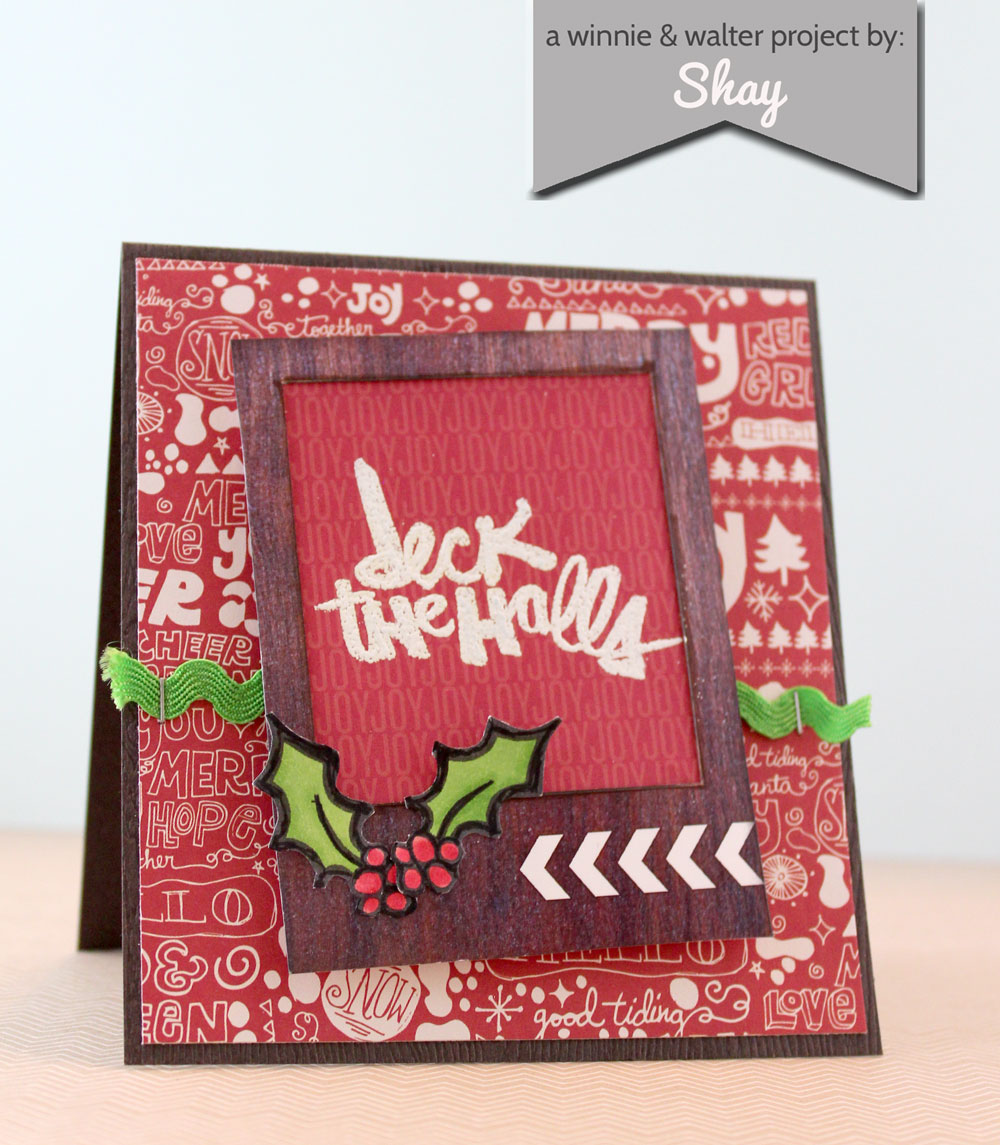
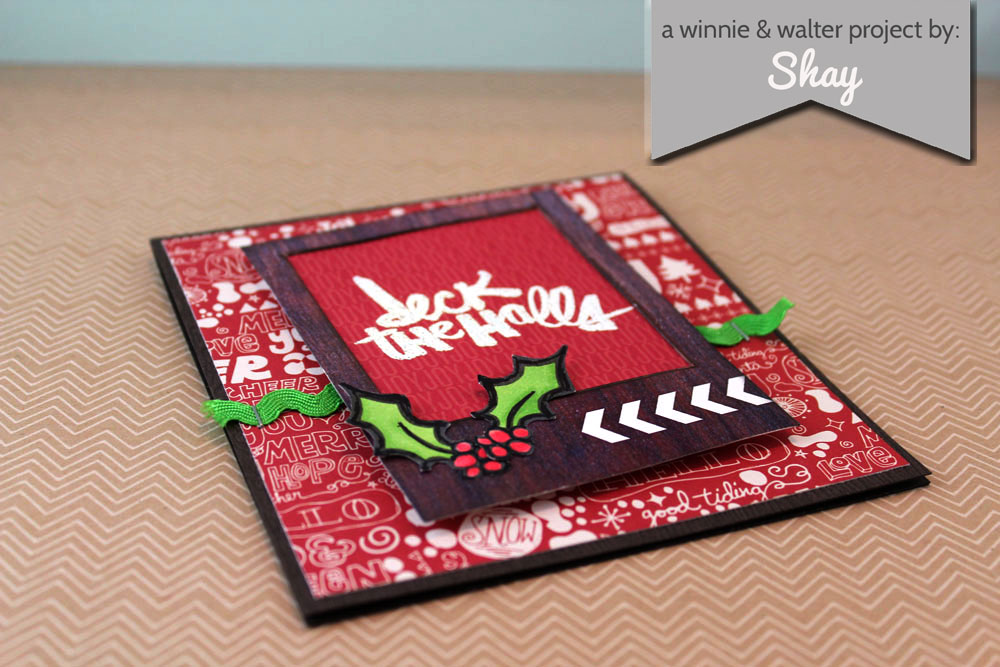
Next I really wanted to pair our new collection with Christmas products.  I chose to pick out the wood grain frame to work with the Magical 6x6 paper pad and the cool Peppermint stamp designed by Kal Barteski.
dgcv1d
dgcv1g

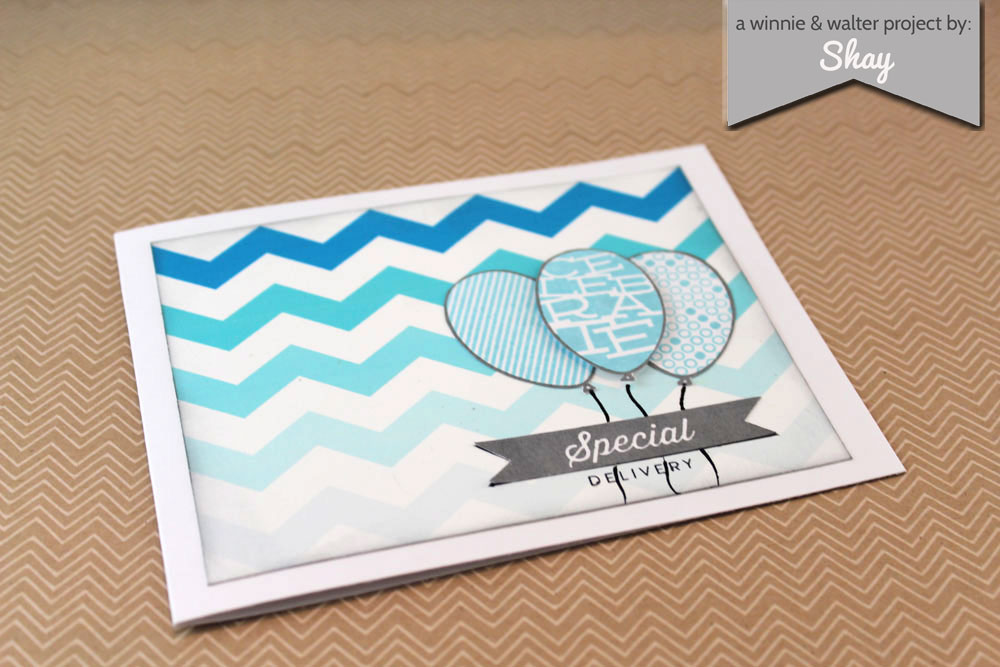
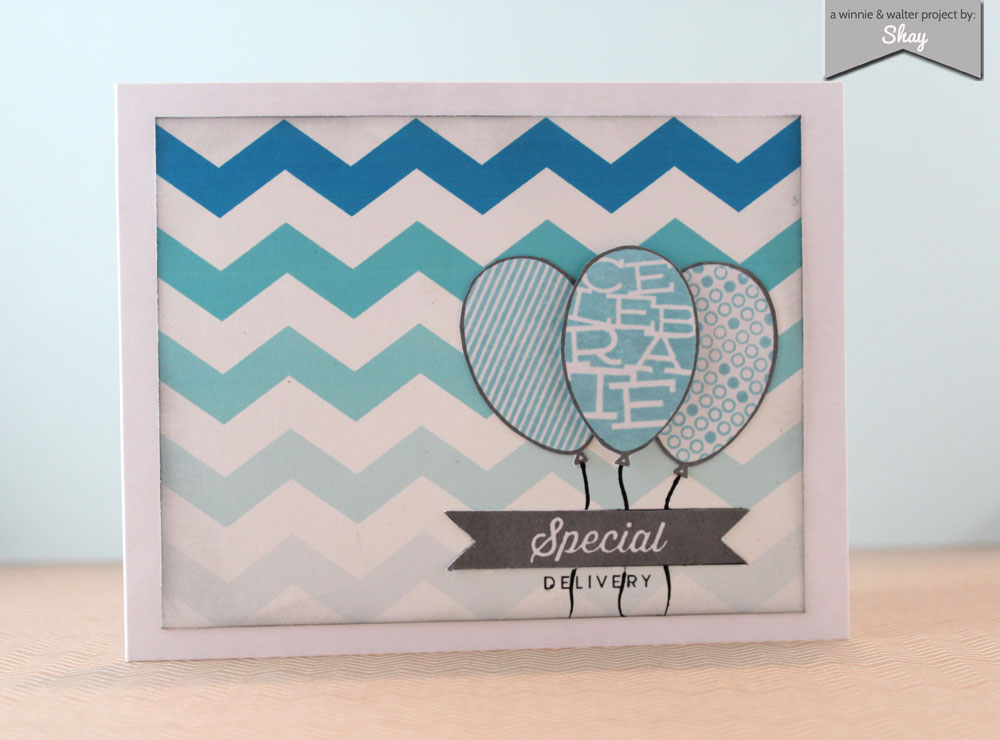
Finally I went with the ombre chevron (really love!) as a base for stamps from Studio Calico.
dgcv1e
dgcv1f

This is just a sampling of what can be done!

Make sure to check out the giveaway and like us on Facebook for your freebie!

Happy creating,
Shay.

Supplies:

Digital: The Daily Grind Collection Vol. 1: Elements; The Daily Grind Collection Vol. 1: Journaling Cards; The Daily Grind Collection Vol. 1: Papers and The Daily Grind Collection Vol. 1: Wood Grain Icons, Winnie & Walter
Stamps: Cuppa Card Kit, Lindsey Letters for Studio Calico; Marks & Co Card Kit, Studio Calico; August Stamp Add-On, Hello Forever for Studio Calico; Tweed Pattern (S5654), Hero Arts; Peppermint stamp add-on, Kal Barteski for Studio Calico; Coconut Grove kit, Studio Calico; Double Scoop Card Kit, Craft Origine for Studio Calico
Ink: brown sugar, malted milk and speckled egg, Jenni Bowlin for Ranger; Veramark and Memento in tuxedo black, Tsukineko; black soot, lipstick pink and dried marigold, Tim Holtz Distress Inks by Ranger; Charcoal mid-tone, Hero Arts
Cardstock: Presentation Paper, Epson (printed upon); white, Georgia-Pacific; recycled white pewter, Neenah Paper; brown woodgrain, Studio Calico
Patterned Paper: Cuppa Card Kit, Studio Calico; Magical 6x6 paper pad, Studio Calico
Other: Thataway pockets, Studio Calico, apricot seam binding, Martha Stewart Crafts; shipping tag, from stash; photo corner punch, EK Success; opaque white embossing powder, JudiKins; embossing heat gun; ric rac, from stash; Tiny Attacher, Tim Holtz; makers, Copic; ink blending tool, Ranger; dimensional foam adhesive.

August 8, 2013

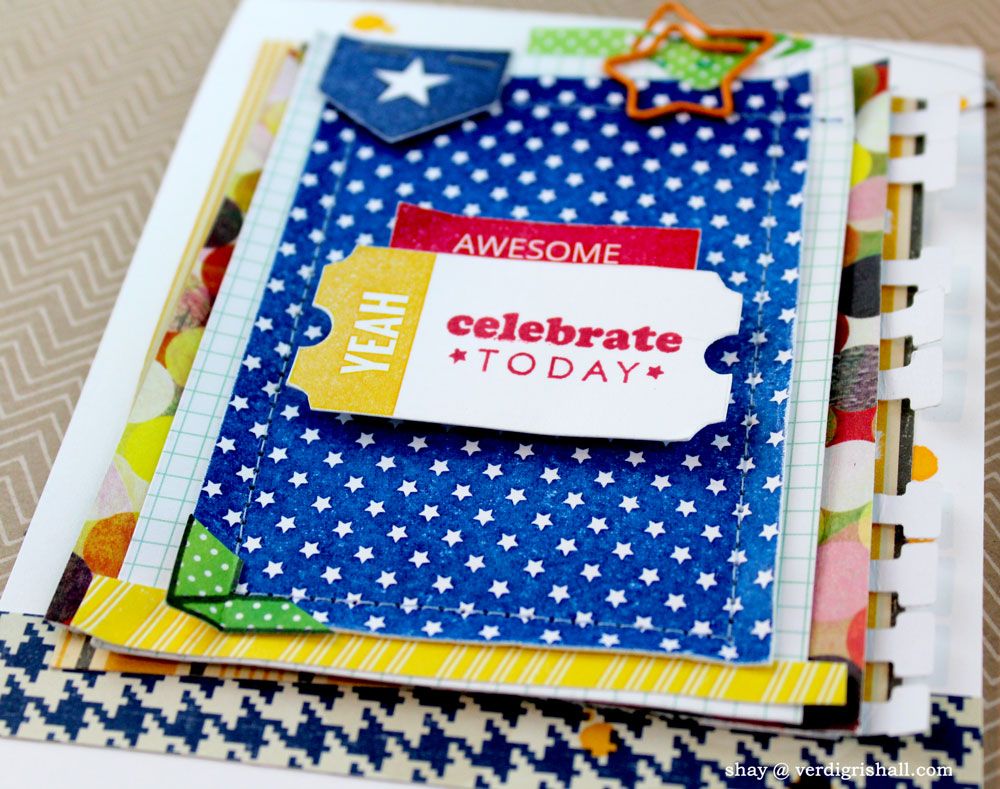
Man Oh Man Monday No. 21 | Celebrate Today

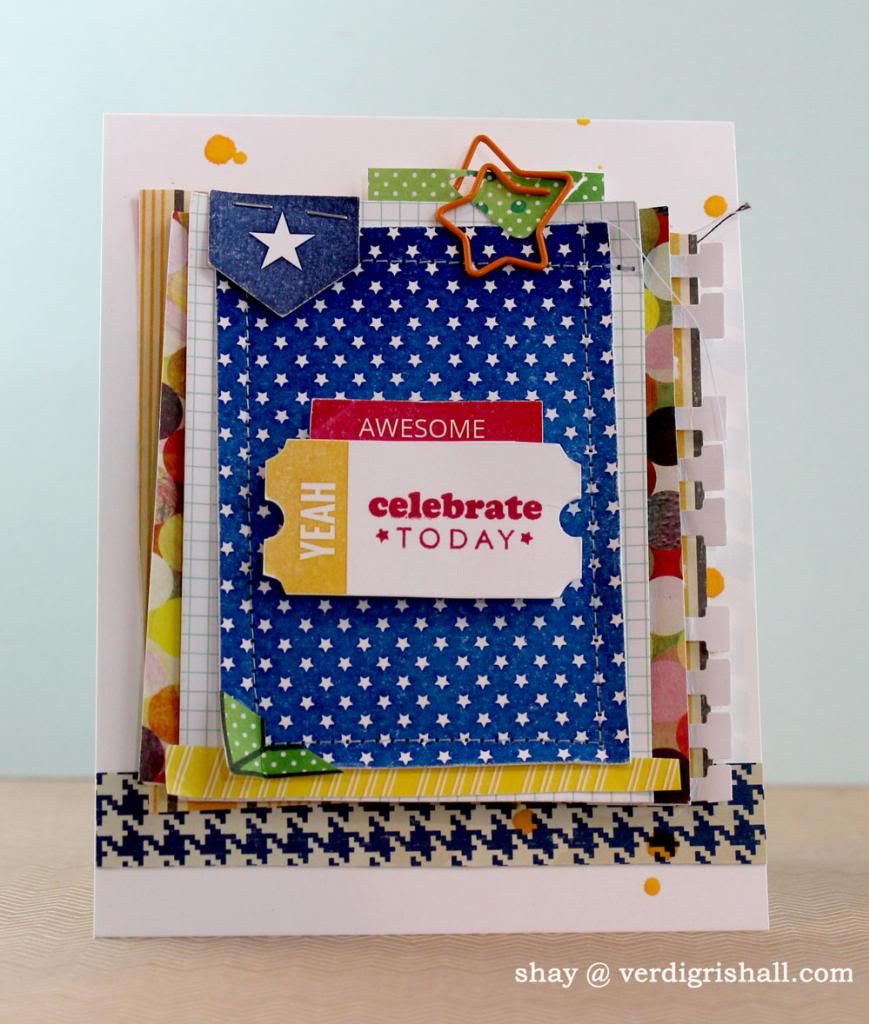
Monday is a state of mind, right?  Because I am posting this week's MOMM on Thursday.  Just ignore the day and concentrate on the card.

You may notice a trend of my using a journaling card (either hybrid or bought) as a jumping off point for my cards lately.  Well, it continues...and continues.


I began with a star card from Emily Merritt Designs' Free.  Another amazing digital kit of journaling cards that can be easily printed out for those who love hybrid or left as a digital element.


I further embellished the journaling card with printable elements from Studio Calico by Marcy Penner (aka Hello Forever).  I am afraid these particular elements are no longer available although they may make them available for a special sale like they did on Cyber Monday last year.  If you do like the elements I used, I recommend buying the Studio Calico printable files available right now from Marcy Penner (Geralyn Sy aka In a Creative Bubble and Natalia Buntar aka blinks of life also design wonderful printables), buying directly from Marcy Penner/Hello Forever or at Two Peas at a Bucket for limited edition printables designed by Marcy Penner/Hello Forever there along with other cool printables and cutting files.

Nearly all of the patterned paper used in this card are from a pile of "older" colorful papers I had cut up into 6x6 squares a while ago to facilitate their use in various projects.

Also in attendance is the sewing machine.  Why it took me so long to get that bad boy out I am not sure.  And why haven't I named him yet (the sewing machine has to be masculine because it is a Brother)?  A question for another day.


That yeah ticket is a  printable that I stamped the sentiment onto.  The photo corner is yet another idiosyncrasy of mine lately.  I stamped the frame from Life Framer onto green and cut the corner off of it.

Hope you have enjoyed this week's MOMM!

Happy creating,
Shay.

Supplies:
Digital: Free, Emily Merritt Designs; May Printable by Marcy Penner (aka Hello Forever), Studio Calico
Stamps: 2012 Birthday Tags, Papertrey Ink; Life Framer, Paper Wings Productions
Ink: cough syrup, Jenni Bowlin for Ranger
Journaling card: Studio Calico
Cardstock: solar white, Neenah Paper
Patterned paper: woolworths from Hometown collection and no. 2 pencil from schoolhouse collection, October Afternoon; chicken pox from June Bug collection, Basic Grey; sketchbook 6x6 paper pad, Amy Tangerine/American Crafts; shoreline 6x6 paper pad, American Crafts
Other: notebook border punch, Fiskars; photo corner punch, EK Success; sewing machine, Brother; star paper clip, Amy Tangerine/American Crafts for Studio Calico; sherbet Mister Huey's Color Mist, Studio Calico; Tiny Attacher, Tim Holtz; dimensional foam adhesive

July 29, 2013

Man Oh Man Monday No. 20 | Hip Hip Hooray


Hello, hello, hello!  Today I am bringing you some fun, bright and happy birthday cards for twin boys turning 6.  I used printables from Studio Calico and Emily Merritt Designs along with stamps from Studio Calico and Paper Wings Productions.


Don't you love the adorable balloon animal?  If you missed out on this one from Studio Calico I recommend buying the equally charming and sweet Party Animal stamp set from Avery Elle.

Card No. 1

 
Card No. 2
 
 
For some variation in the cards I colored in each balloon animal with its own color with Copic markers and changed up some of the journaling cards mounted behind the balloon animal journaling card.  I also added the opposite color for a little pop on the photo corner cut from the frame from Life Framer.
 
 
For added dimension on the balloon animal journaling card layer I added some dimensional adhesive under the edges, but not the center of the journaling card.  To give the notebook page journaling card more interest I punched holes, cut into the holes and curled up the edges.
 
 
What do you think?  I hope my cousins like them.  Hope you have a wonderful week!

Happy creating,
Shay.

Supplies:
Digital: April Printable by Geralyn Sy (aka In a Creative Bubble), May Printable by Marcy Penner (aka Hello Forever) and July Printable by Marcy Penner (aka Hello Forever), Studio Calico; Hey There and Shine, Emily Merritt Designs
Stamps: stamp set from Coconut Grove Add-On Card Kit, Studio Calico; life framer, Paper Wings Productions
Ink: tuxedo black Memento, Tsukineko; cough syrup and spice tin, Jenni Bowlin for Ranger
Cardstock: white, Georgia-Pacific; solar white, Neenah Paper
Patterned paper: Sketchbook 6x6 paper pad, Amy Tangerine/American Crafts; dilly dally "curious" petals from miss caroline collection, My Mind'e Eye
Other: journaling cards, Studio Calico; chevron border die, Avery Elle; Cuttlebug, Provo Craft; sewing machine, Brother; mint blue (B01), manganese blue (B34), mignonette (YG11), chartreuse (YG13) and skin white (E00), Copic; seal punch, Martha Stewart Crafts; twilight sprinklers color mist, October Afternoon; hole punch, Fiskars; tiny attacher, Tim Holtz; foam dimensional adhesive


June 24, 2013

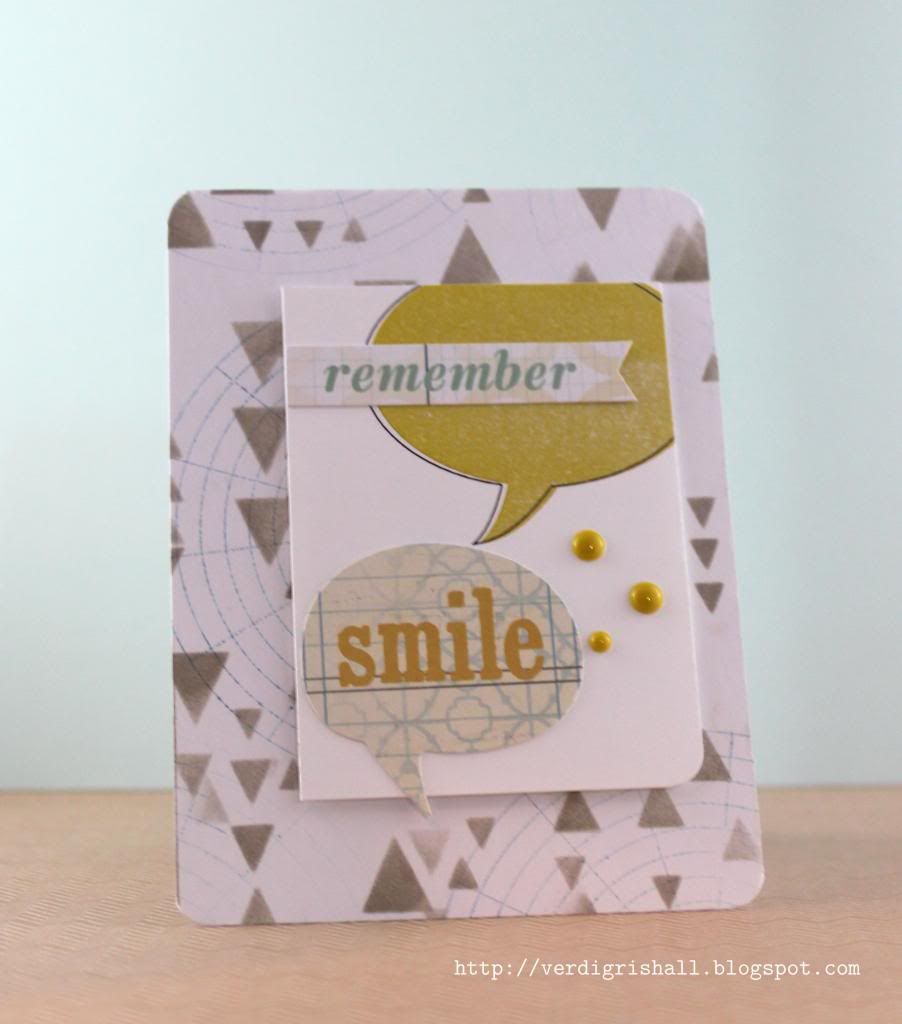
Man Oh Man Monday No. 16 | Remember Smile

Hello there my friends.  How is this Monday treating you? 

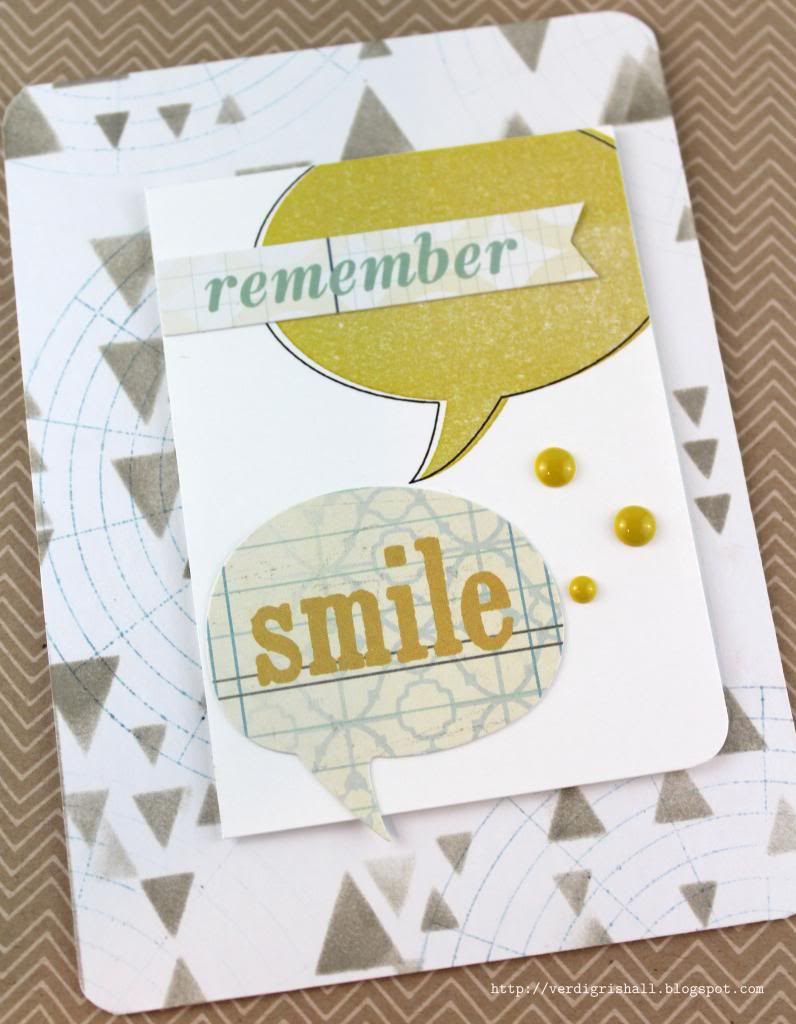
For today's MOMM I decided to pull out the arrowheads 6x6 stencil/mask by Prima Marketing, my ink blending tool and pumice stone Distress Ink to create my own background paper.  I added some stamping of the Plano stamp by Studio Calico/Hero Arts over the arrowheads for a little more interest.


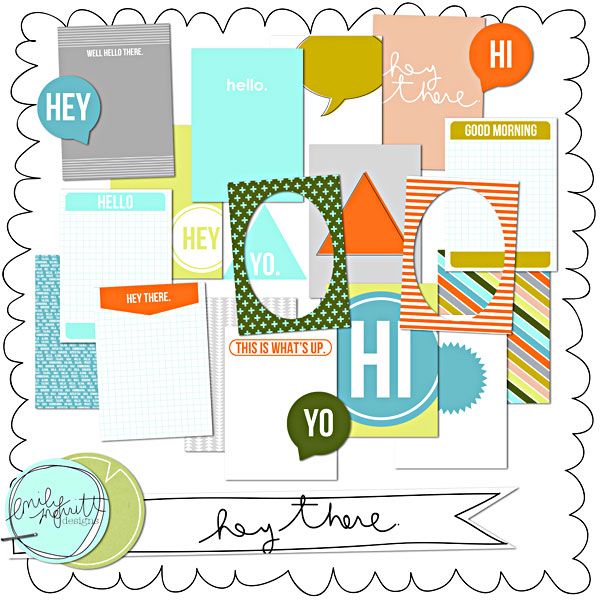
I also printed out another set of journaling cards from Hey There by my new best digital designer, Emily Merritt Designs.   I don't know Emily Merritt, but I sure do dig her journaling cards!


I first went with the triangle yo. because it is cool and works well with the arrowheads design, but then I did some sewing (or too much sewing) on the card and it just wasn't working for me anymore so I went with the speech bubble journaling card and paired it with the ephemera from Pink Paislee's Portfolio collection that happen to be in colors that work great with the card (maybe due to my printer changing the colors of the cards).

I rounded one of the corners of the journaling card and adhered the journaling card to the card base using dimensional adhesive.  Lastly, I rounded all the corners of the card base.
 
I think this card would be great for encouraging some guy either when he's going for interviews, working on a big project or having some troubles at home, school and/or work.  It could even be used to say hello.

I hope you are encouraged to create something fun for the guys in your life.

Happy creating,
Shay.

Supplies:
Stamp: plano, Studio Calico/Hero Arts
Ink: pumice stone, stormy sky and tumbled glass, Tim Holtz Distress Ink by Ranger
Cardstock: white, Georgia Pacific; solar white, Neenah Paper
Other: ephemera from Portfolio collection, Pink Paislee; Arrowheads stencil/mask, Prima Marketing; Inkssentials ink blending tool, Ranger; dimensional adhesive; Crop-A-Dile Corner Chomper, We R Memory Keepers; bluebell "smile" enamel dots from The Sweetest Thing collection, My Mind's Eye

June 10, 2013

Man Oh Man Monday No. 14 | Father's Day Edition No. 6

We continue on with Father's Day as it is less than a week away.  Have you gotten your card done or bought?  

I am putting a tiny spotlight on hybrid Father's Day cards today.  Hybrid simply means using something created on a computer (digital) and then printed to make something physical.  You can create the digital design/sentiment yourself, purchase other people's designs from various online stores or create something for yourself using purchased designs.  There are some truly amazing digital products and designers out there.  For recommendations, let me know because I can do a detailed list.

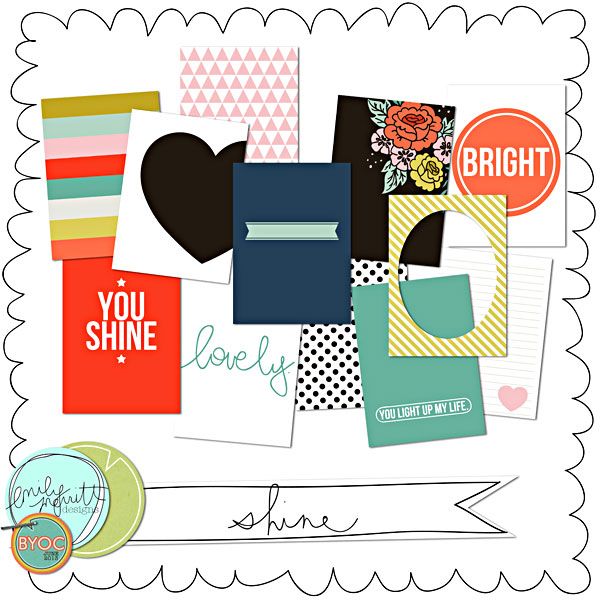
For the cards today I started with Shine, this digital journaling card product by Emily Merritt Designs:


This mix of journaling cards has it all: feminine, masculine and gender neutral for young and older alike for all sorts of occasions with bright happy colors.  Included are convenient pdf files for easy printing of the journaling cards. I printed out one of the pdf files. My printer makes everything look distressed (a positive spin on the lack of quality) so don't assume that your print quality will be as poor as mine.  I just go with it until I get it fixed.  If you like the distressed look I have found that using an eraser on the image...well...for lack of a better word...erases some of the ink.

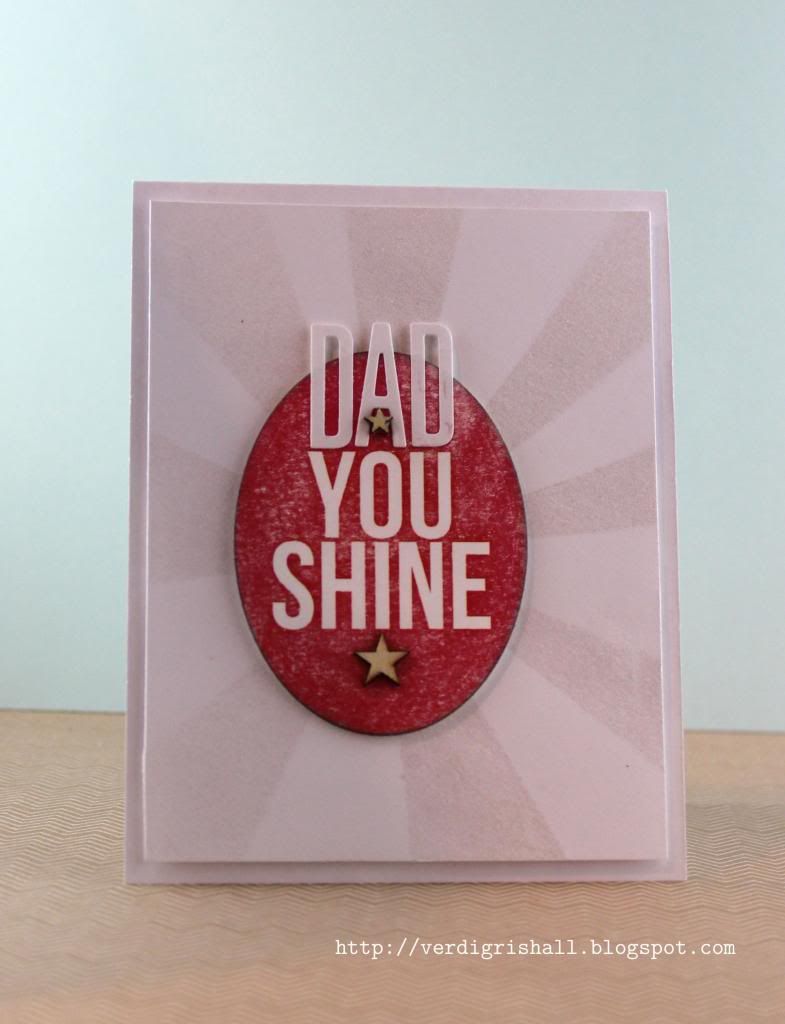
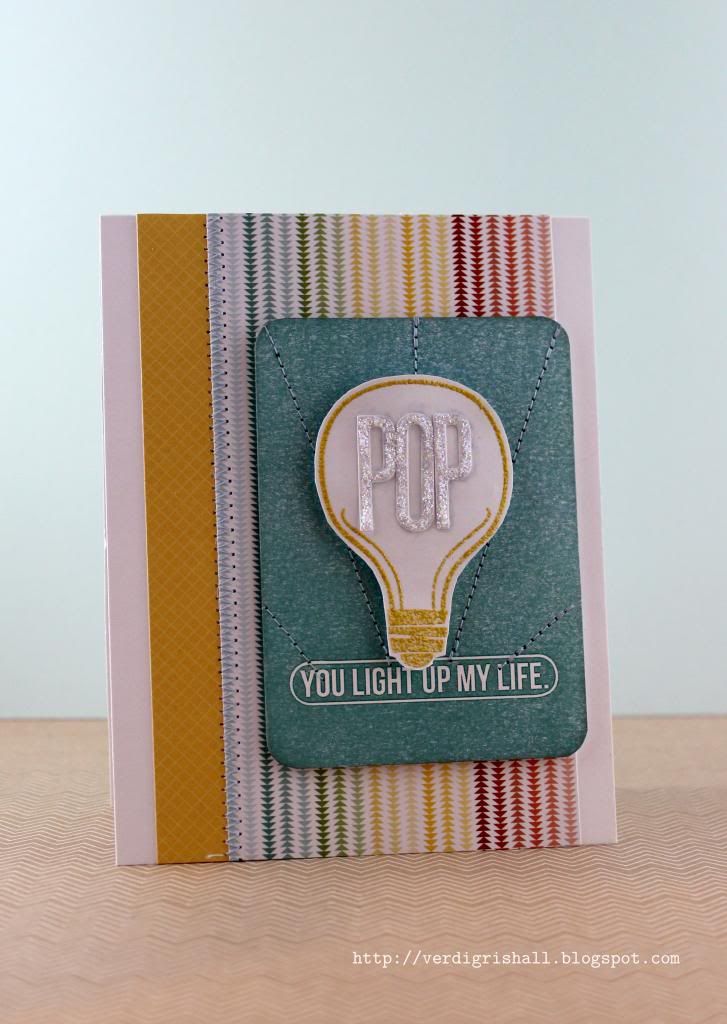
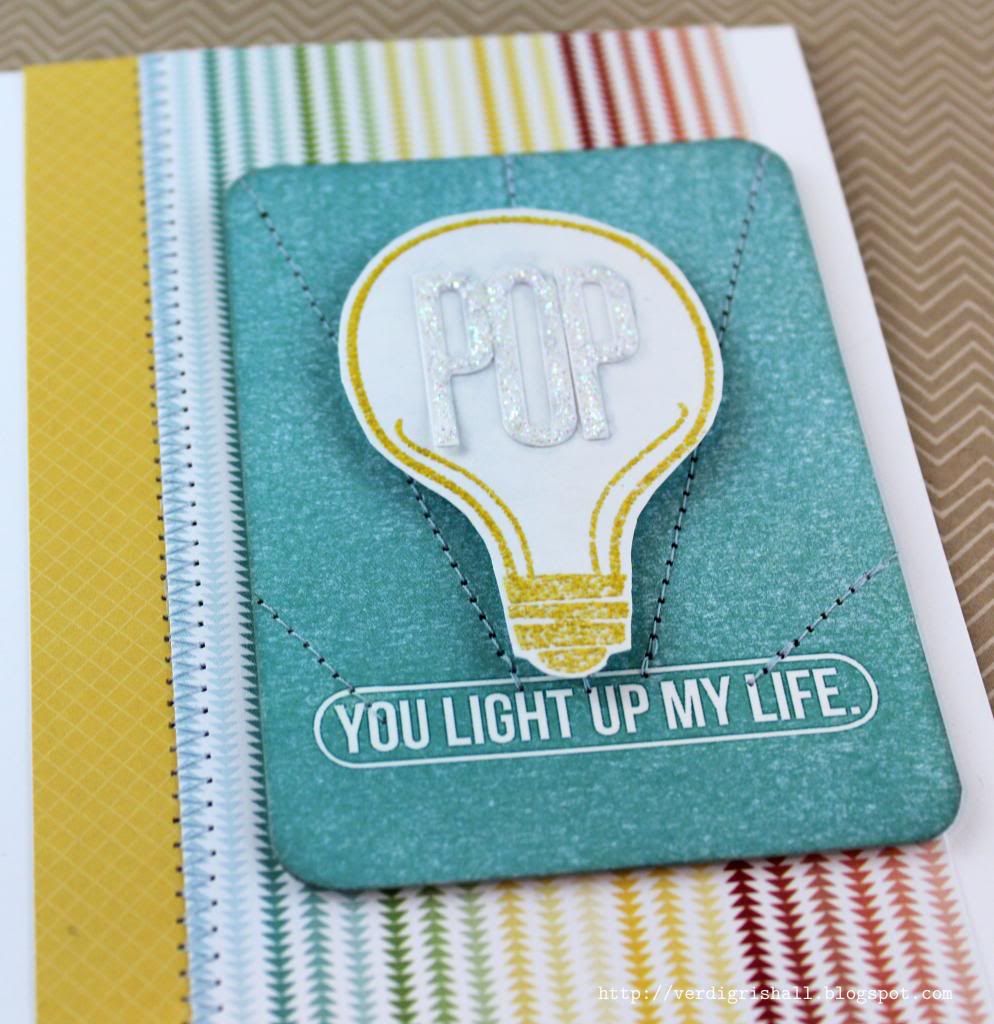
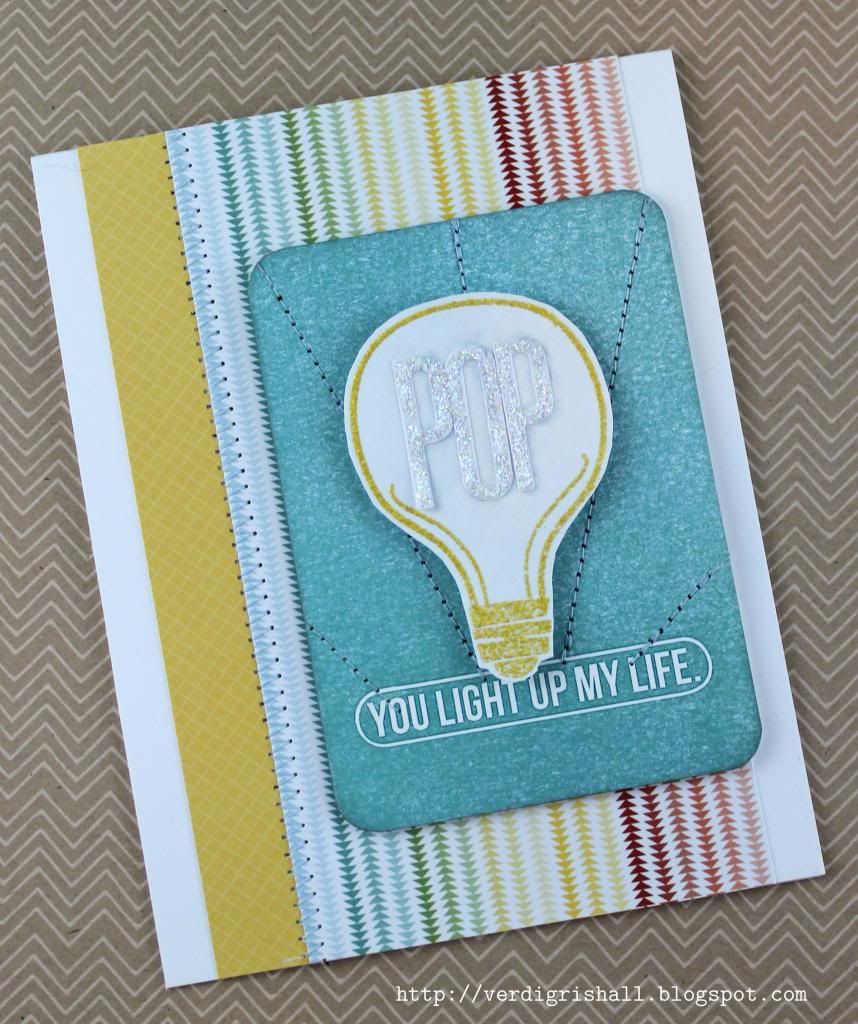
I chose to make cards from the "you shine" and "you light up my life" journaling cards.  I am still on a sun ray/sun burst kick so these cards are inspired by that idea as well.

Card No. 1

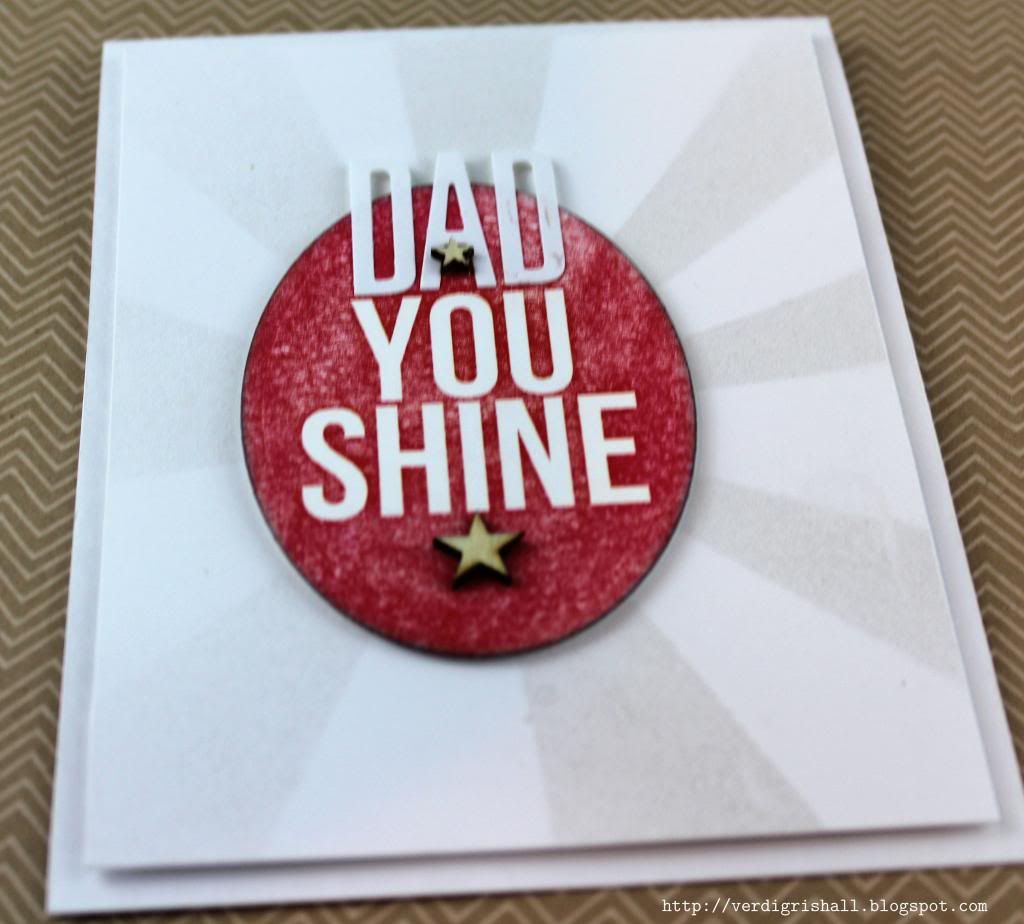
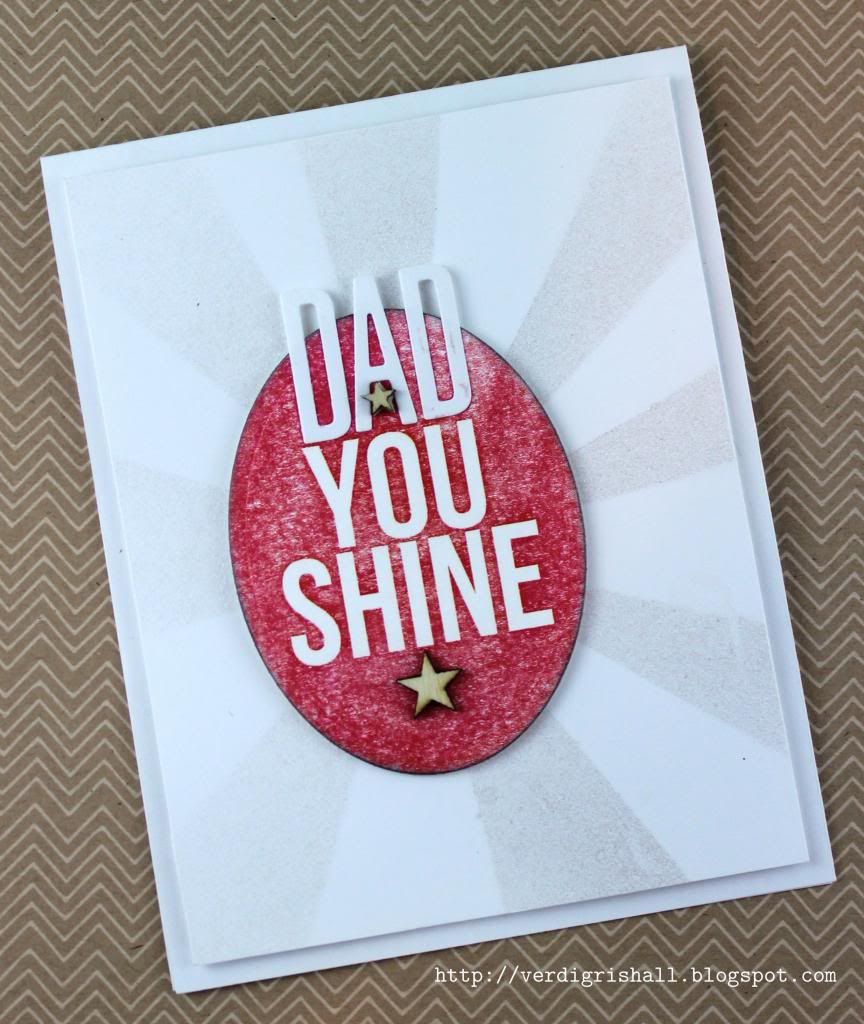
For you shine I cut the sentiment using an oval die and decided to use my Studio Calico burst mask with Mister Huey's Calico Shine on white cardstock for a cool subtle tone on tone look.  I added "dad" using the Headline alphabet die and a couple of star wood veneers.  Simple, bold and interesting. 


Truly, in person the shine looks really cool.


Card No. 2


For You Light Up My Life I decided to add a cute light bulb from a Lawn Fawn stamp set made for Studio Calico's Spencer's Card Kit.  I pulled out some new mustard embossing powder to emboss the image.  I also did some sewing on this card as I had the sewing machine out still after this project.  I am still a bit shocked by how easy it was to sew on paper.  Maybe I am finally mature enough to sew!  I am only about 1 or 2 decades behind everyone else (as usual).   I used the Headline alphabet die once again and added a touch of shimmer and interest by adding stickles to the "pop".


Fun, colorful and easy.

I may or may not be around again for a bonus MOMM Father's Day Edition this week because I recently received some new stamps that are meant to be inked up!  If I don't, I hope you have a delightful Father's Day celebrating the fathers/father figures that have enriched your life!

Happy creating,
Shay.

P.S. I am submitting these cards to the Simon Says Stamp Challenge blog for Masculine/Father's Day.

P.S.S. You can find me on Paper Wings Productions' The Aviary tomorrow for Tutorial Tuesday.

Supplies:
Digital product: Shine, Emily Merritt Designs
Stamp: from Spencer's Card Kit, Lawn Fawn for Studio Calico 
Ink: Versamark, Tsukineko; black soot, Tim Holtz Distress Ink by Ranger
Cardstock: solar white, Neenah Paper; stamper's select white, Papertrey Ink; white, Georgia Pacific
Patterned Paper: Snippets 6x6 paper pad, Studio Calico
Other: Mister Huey's 12x12 burst mask, Studio Calico; Mister Huey's Calico Shine, Studio Calico; sewing machine, Brother; oval nestabilities die, Spellbinders; Headline alphabet die, Papertrey Ink; Cuttlebug, Provo Craft; star dust stickles, Ranger; mustard Zap! embossing powder, American Crafts; star wood veneer, Studio Calico; Crop-A-Dile Corner Chomper, We R Memory Keepers; dimensional adhesive; embossing heat gun; Inkssentials ink blending tool, Ranger

February 7, 2013

Papertrey Ink's 6th Anniversary Free Printables: Dawn McVey

Dear Reader,

Yes, I am back for more tonight.  I think this will do it even though I would love to use more of the printables offered by Papertrey Ink's designers in honor of their 6th anniversary.  Time and energy does not permit.  You can see my first card HERE and more information about the printables HERE.

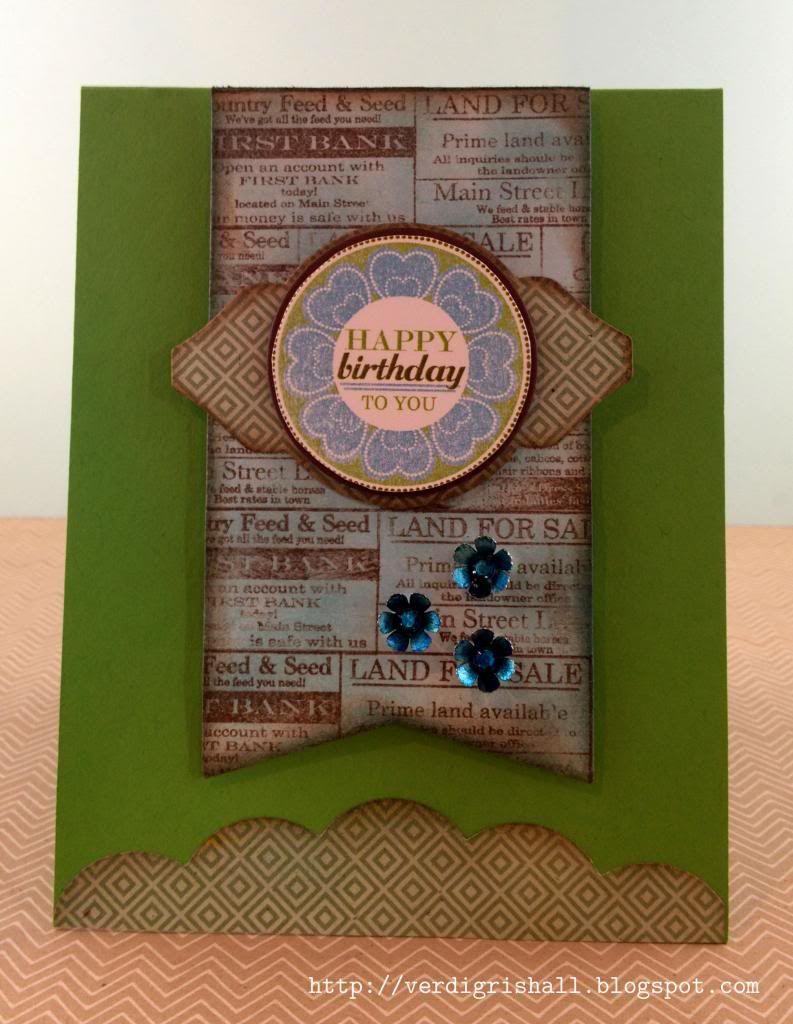
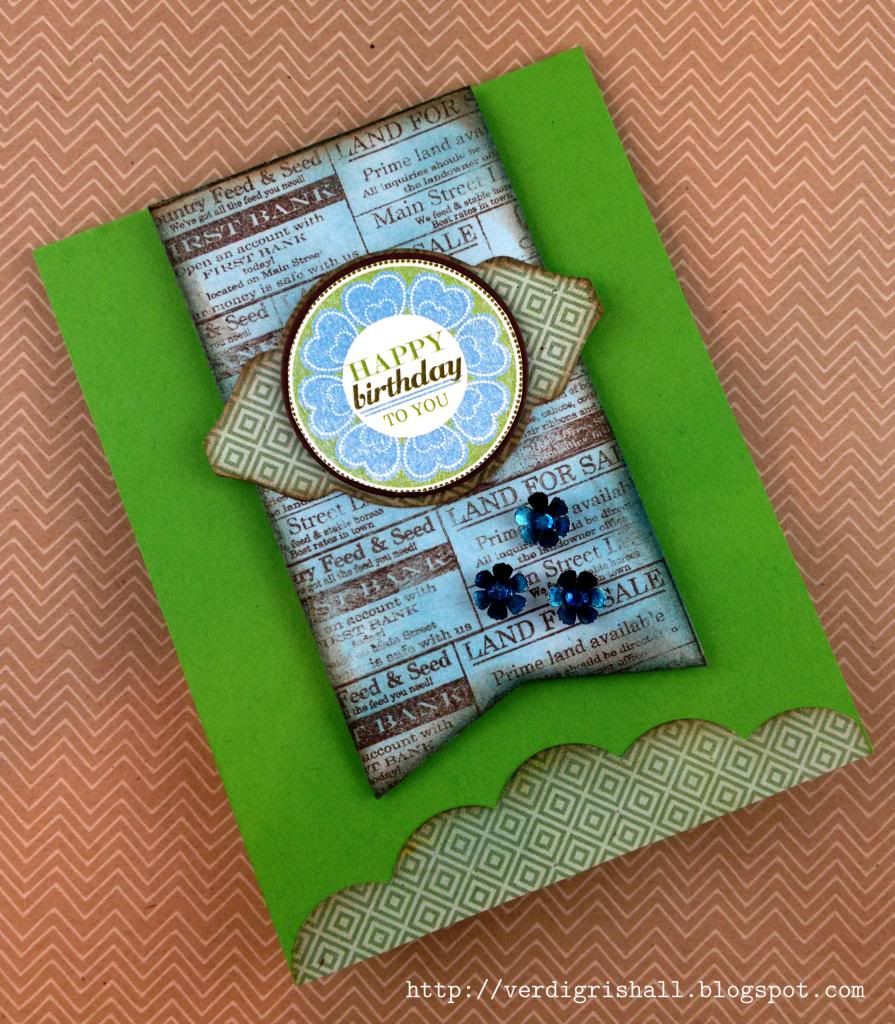
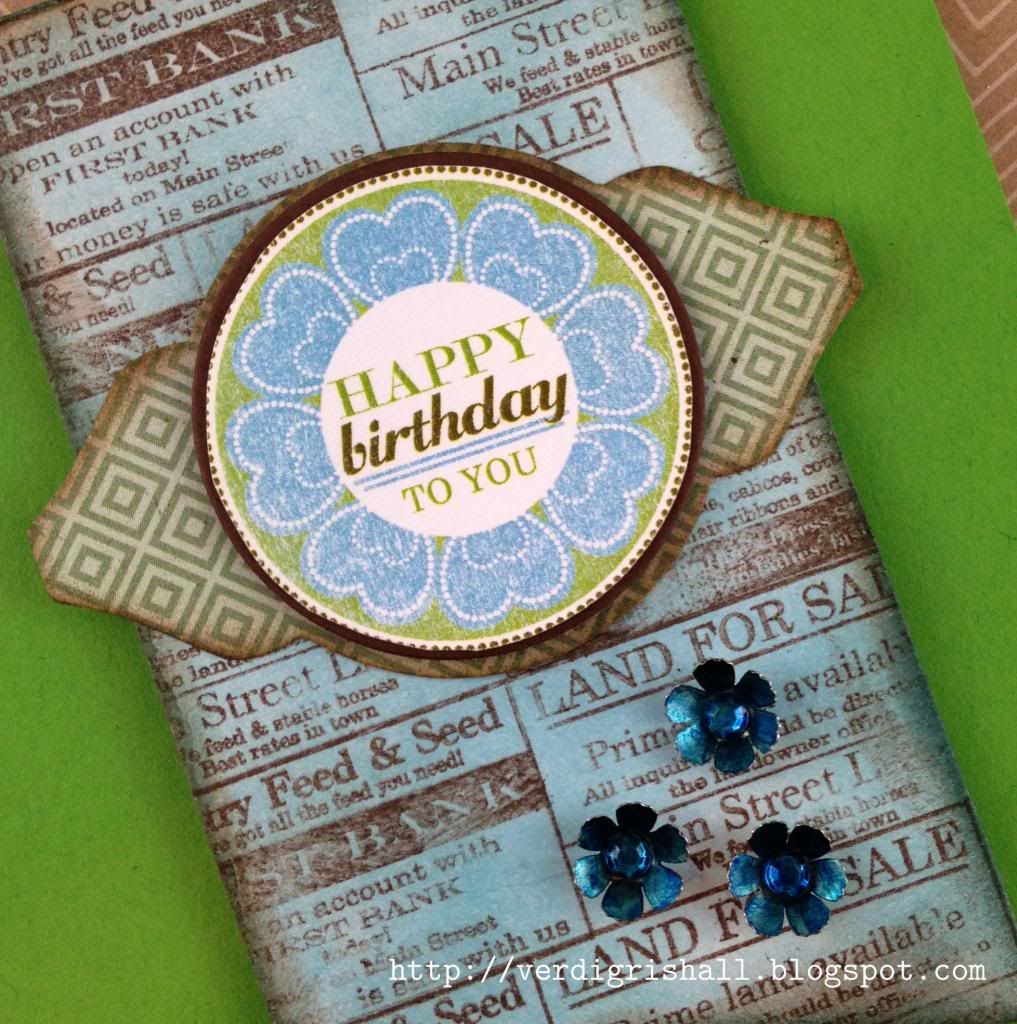
My next card uses the birthday printable by the talented and bright Dawn McVey.  I really admire her bold, colorful and dynamic designs and projects.  I don't have her skill, but I hope my card honors a bit with the pops of sensational leaf green and Hawaiian shores with a touch of chocolate brown thrown in for good measure.


I decided to mount the printable on the simple circle die from Limited Layers: 1 3/4" circle dies cut from chocolate brown and then I mounted in onto a piece of patterned paper by Basic Grey cut with the Mat Stack 2 die and inked on the edges with dark chocolate ink.  The printable stack was then adhered to a piece of die cut cardstock using the Wine Bottle Tag die that I then stamped with the Background Basics: Newsprint stamp using dark chocolate ink.  I colored it in with tumbled glass and a little broken china and dark chocolate inks on the edges.  I added three brads I colored in with Copic markers.  All of this was adhered with dimensional adhesive to a card base of new leaf cardstock.  Lastly I added a piece of Basic Grey patterned paper die cut with the Edgers #1 Die Collection to the bottom of the card.

Another look:


And a close up shot:


Thank you so much Dawn McVey for years of crafting goodness!

And thank you for stopping by to visit.

Happy creating,
Shay.

Happy Birthday to You Card
Supplies:
Printable: Dawn McVey/Papertrey Ink
Stamps: Background Basics: Newsprint, Papertrey Ink
Ink: dark chocolate, Papertrey Ink; tumbled glass and broken china, Tim Holtz Distress Ink by Ranger
Cardstock: new leaf, Papertrey Ink; white, Georgia Pacific
Patterned Paper: clippings 6x6 paper pad, Basic Grey
Other: Mat Stack 2 die, Wine Bottle Tag die and Edgers #1 Die Collection, Papertrey Ink; With Love flower brads, Making Memories; BG07 Petroleum Blue and B06 Peacock Blue markers, Copic


January 18, 2013

Dated: Hybrid Card for a Guy

Dear Reader,

How are you this fine Friday?   Exceedingly well I hope!

My mom was always big on sending birthday cards to family.  A few years ago I took over and began making handmade cards for my family (and friends although I was failed miserably last year...crash and burn style).

I am here today to share a masculine birthday card.  The first in a series I will be making this year.  Perhaps you remember the cards I made a couple of years ago which you can see again HERE (more than likely not)...I am using a similar philosophy this year as well.

I am a collector lover of digital products.  It is amazing the multitude of amazing designers out there.  It was actually a product by Designs by Lili (you may also know her as the designer of such marvels as Clementine Edition, Baby Editions, Jade Edition and Seasons Mini Kit of Project Life...she's good) that was the spark for this card's design (and those in the future).

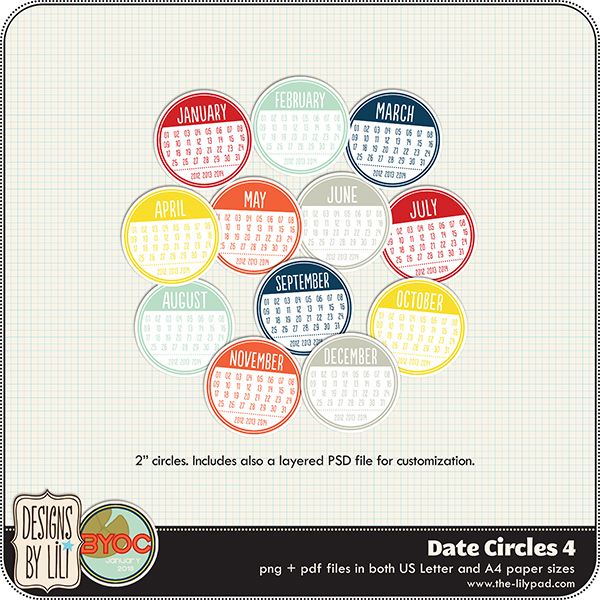
Meet Date Circles 4 (Hint, hint: they and everything at The Lilypad (one of my favorite digital shops) are on sale this weekend--January 18-January 21, 2013):


Pretty darn cool, huh?  I love the dates, circular design and colors of these Date Circles 4.


I placed the images of all the months I needed onto a Word document and printed them out on a single sheet of white cardstock.  Our new printer is a little off in color (it must need adjustment) as the orange came out red and the red a little more of a pink-red, but regardless they are still cool.

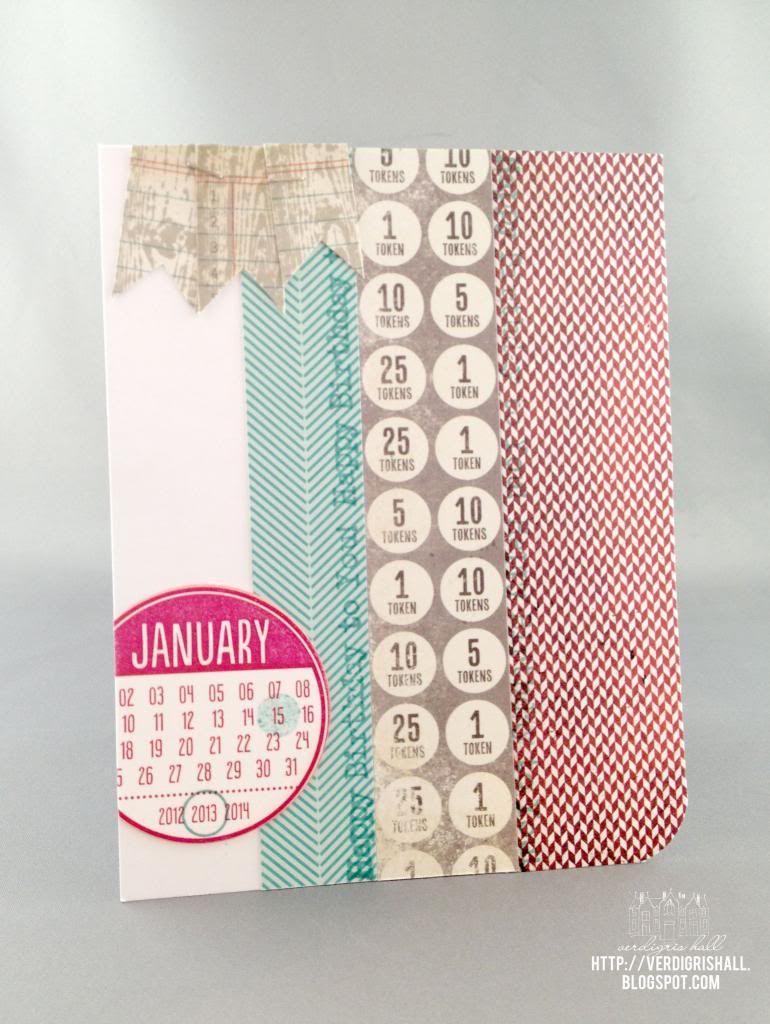
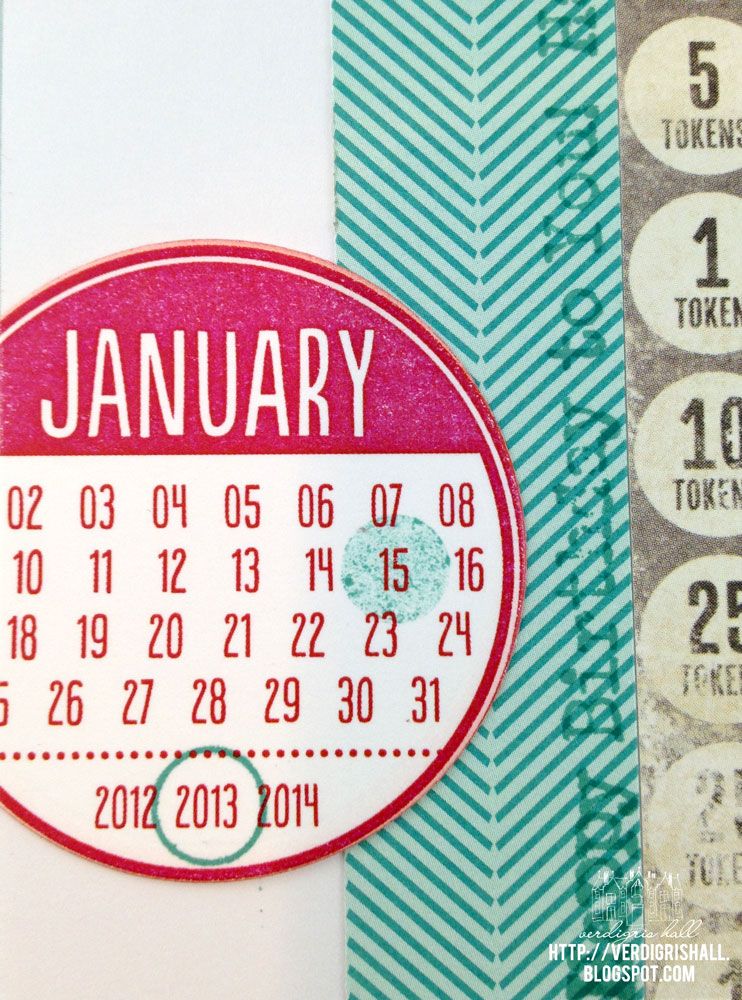
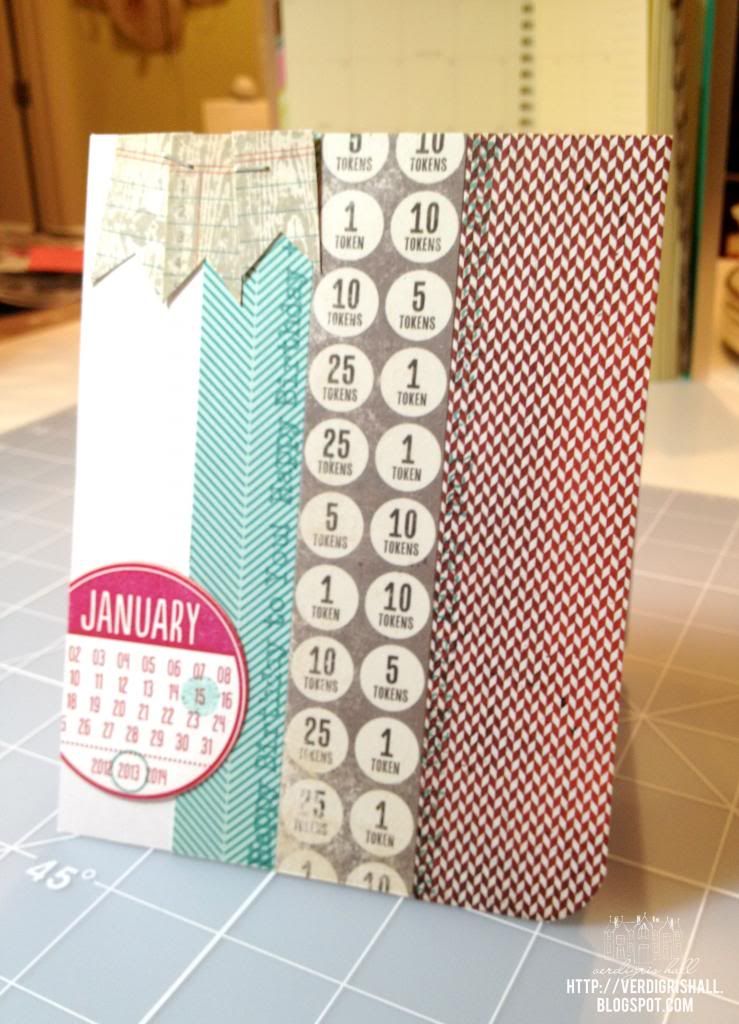
I began with a white cardbase (my favorite) to begin the card.  I already had Lawn Fawn's Dewey Decimal petite paper pad (6x6 paper) out from another card (boy, this is has become a go-to paper collection) and I thought the aqua/teal would be great with the red January circle.  I also picked out a piece of patterned paper with numbers and circles from My Mind's Eye Miss Caroline collection (Dilly Dally "Celebrate" Token) in a wonderful grey...red, grey, white and aqua/teal a winning combination.  The red herringbone piece of paper came from Basic Grey's Clippings collection 6x6 paper pad.  All of these papers are cut into strips of various widths for interest and adhered to the cardbase.

I wanted to use the "happy birthday to you" from Studio Calico/Hero Arts stamp set Calico Borders and I also wanted to bring in more of the teal color.  I found to my delight that Tim Holtz Distress Ink by Ranger in evergreen bough is a perfect match.  I stamped it once on the teal strip and also on the red strip (it is hard to see but there subtly).

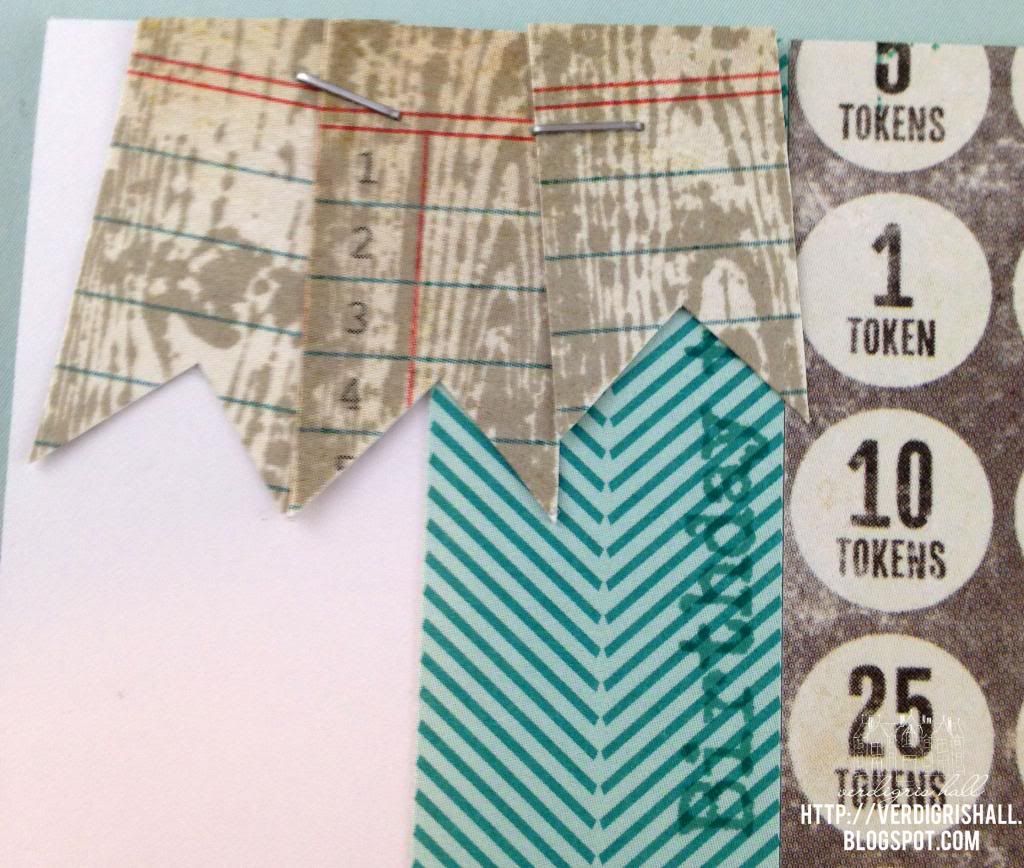
Using the reverse side of the My Mind's Eye Token paper (a cool ledger that coincidentally had the red and teal color too!), I stamped the woodgrain banners (woodgrain + banner = awesome) from the "Baby" stamp set from My Mind's Eye Miss Caroline Howdy Doody in wet cement Hero Arts Shadow Ink Mid-Tone, cut them out and adhered them together with my handy dandy Tim Holtz Tiny Attacher and then adhered them to the top left border of the card.


Lastly, I used the outline circle and solid circle from Cocoa Daisy's Day in the Life: Pick a Date Calendar stamp to highlight the day and year in the evergreen bough ink on red January calendar and then adhered it all to the card (making sure to cut off the overhang of the January circle) and I rounded the bottom right hand corner of the card.  By the way, check out Cocoa Daisy's stamps because they are pretty fantastic.


And there you have it, a personalized hybrid card for a guy (picture of the card in its natural habitat or place of origin aka my studio).


Thank you so much for taking the time to visit!

Have a brilliant weekend,

Shay.

Happy Birthday to You Birthday Card
Supplies:
Digital: Date Circles 4, Designs by Lili at The Lilypad
Stamps: Calico Borders, Studio Calico/Hero Arts; Baby from Miss Caroline collection, My Mind's Eye; A Day in the Life: Pick a Date Calendar stamp, Cocoa Daisy
Ink: evergreen bough, Tim Holtz Distress Ink by Ranger; wet cement, Hero Arts Shadow Ink Mid-Tone
Cardstock: solar white, Neenah Papers; white, Georgia Pacific
Patterned Paper: Dewey Decimal Petite Paper Pad, Lawn Fawn; Clippings 6x6 Paper Pad, Basic Grey; Token from Dilly Dally "Celebrate" Miss Caroline collection, My Mind's Eye
Other: Tiny Attacher, Tim Holtz; Crop-A-Dile Corner Chomper, We R Memory Keepers 

January 18, 2012

Bohemian Flower


Dear Reader,

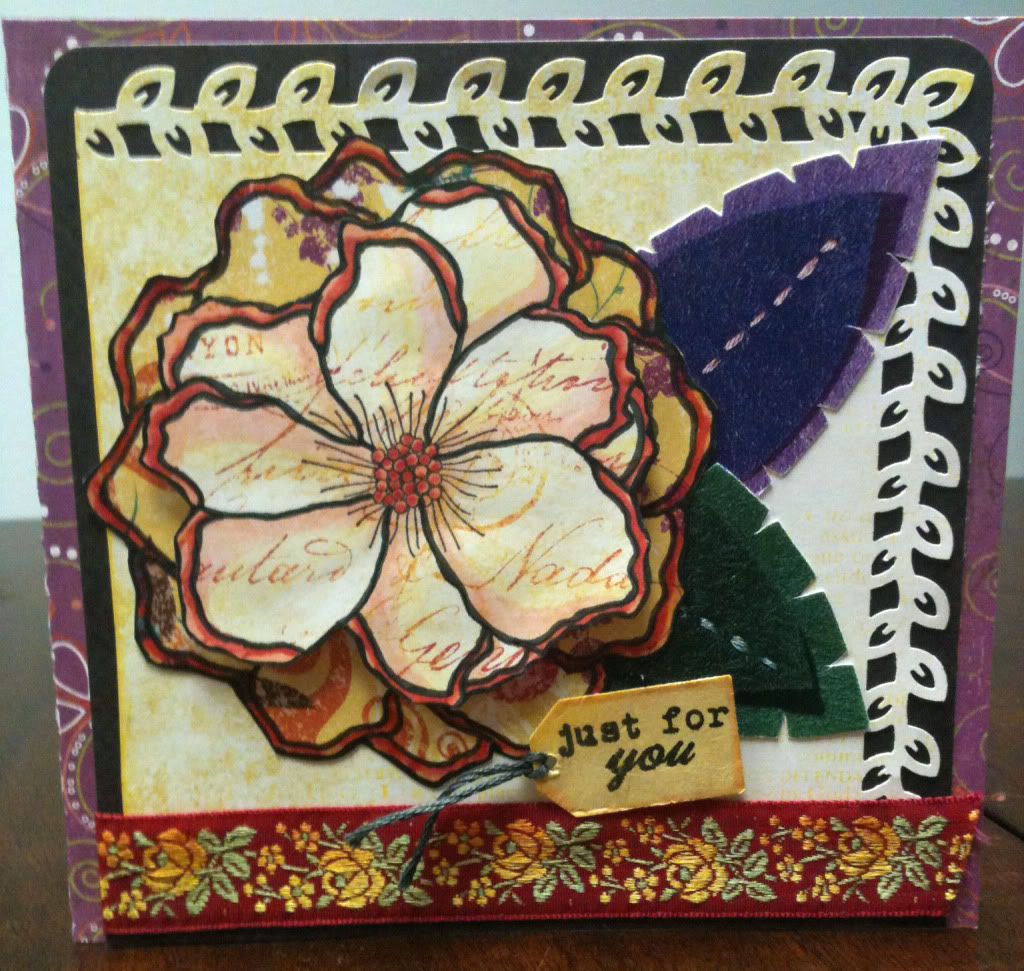
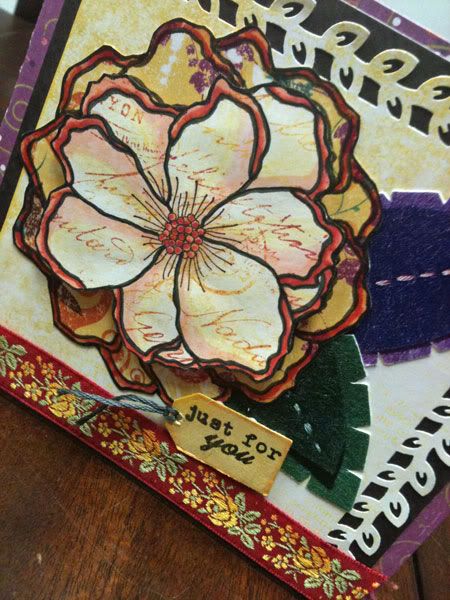
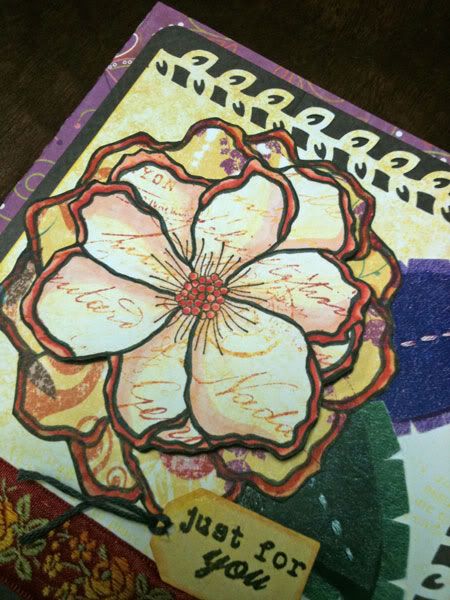
For a college friend of mine I wanted to make a card with a gypsy or bohemian feel for her birthday.  I was also taken with coloring and playing around with Hero Arts' Stencil Flower (CG194).  I love this stamp and I keep on buying flowers similar to it so I can do paper piecing + coloring with them like I did for this card.  


I usually cut up the flower into two parts for added interest and dimension. The top part of the flower I chose a more muted part of the paper and then I stamped over this section with the Old Letter (CG197) stamp using a mix of inks for variegated coloration.  I edged the entire flower with marker to make it really pop and colored in parts with my Copic markers.  The top layer of the card is then attached to the bottom using dimensional adhesive.  The leaves are actually digital images of felt feathers from Kitschy Digitals (all of her designs can be found at http://www.jessicasprague.com/) that I printed out and cut out.
Thanks for stopping by.

Happy creating,
Shay.


{bohemian birthday card}
stamps: stencil flower (CG194), old letter (CG197), Hero Arts; fillable frames #9, Papertrey Ink
ink: tuxedo black, Momento by Tsukineko; lemon drops, chicken feed and chili powder, Jenni Bowlin for Ranger
patterned paper: purple from Green at Heart, Basic Grey; yellow paper, Glitz Design (I believe)
markers: Copic; soft black, Memory Markers by American Crafts
die: tiny tags, Papertrey Ink
punch: Martha Stewart
leaves: pretty felt feathers, Kitschy Digitals
other: ribbon from stash; embroidery floss, DMC; dimensional foam tape; crop-a-dile corner chomper, We R Memory Keepers; cuttlebug, Provo Craft

October 31, 2011

The Saga of the Halloween Invitations

Dear Reader,

Around this time each year I become consumed with our annual Halloween party.  For some reason I spend an inordinate amount of time on the invitations...they become the bane of my existence for a while until I finally, finally send them out.  This year was no exception.  I began trying to come up with a concept for them this summer (I was hoping to be ahead of the curve for once!).  I thought I knew what I was going to do, but no I of course had to change my mind. 

Finally, Rhonna Designs came to the rescue (and some older frames from Rhonna through House of 3).  I bought the lovely Spooky Junque Banner Kit and it was finally the answer to my invitation design woes.  Back in August I drew up some characters for my invitations and I finally figured out how to use them with the banners.  Also, I bought some products from Martha Stewart, stamps from Lawn Fawn and some other digital products from Jen Allyson (Vintage Findings Halloween Collection and Vintage Findings Halloween Apothecary Labels)and they became the basis of the invitations.  Another fun addition was a frame by One Little Bird Designs.

Here is a little sneak of the invitations, courtesy of my cell phone:


Wishing everyone a very spooky and splendid Halloween!

Happy {haunting} and creating,
Shay.

September 6, 2011

Streamlined: Male Hybrid Birthday Cards

Dear Reader,
I find myself often needing birthday cards for male relatives and being at a loss of what to make the night before I need to send one out.  Sound familiar? 

Perhaps you are much better than I and are a planner.  I aspire to be you.

So, I followed your example and made all the male relative birthday cards up until April in January.  I felt proud of myself and then promptly forgot to send the first 2 January birthday cards out in time for my uncle and cousin to receive them on (or before) their birthday.
 
Lesson learned: make the cards AND send them out on time.

I decided on doing a graphic streamlined design with a few alterations to personalize the card.  Personalization: the birth date of the birthday guy + the stamp used. 


I have been enthralled with dates lately.  Studio Calico had some awesome month and date of the week stamp sets which I foolishly missed out on and ever since I have been collecting date items to compensate.  I call it stamp envy.

So, I found a very cool digital kit by Ali Edwards at Designer Digitals with days of the week and also used some awesome digital elements I bought from Roben-Marie Smith before she retired from digital designing (big loss!  Good news: she still has her stamp company, Paperbag Studios).

I tried to use a border/background stamp that either symbolized an interest of the birthday guy or had a design aesthetic I thought they would appreciate.  I really love the look of a line of graphics that border stamps (or sometimes background stamps like those by Papertrey Ink or Glitz Designs) give you.

Another moment to praise Studio Calico: their stamps are wonderful (admittedly, the reason I subscribed many moons ago) and when possible I used some of the border stamps I had in my collection.  Like the books.  I have a cousin who reads voraciously so that stamp was perfect for him.


Here are the rest of the cards for your viewing pleasure:


Thanks for stopping by the Hall!

Happy creating,
Shay.

Date Birthday Cards
Supplies:
Digital:
{days of the week}Today Textured Word Art by Ali Edwards at Designer Digitals;
{month}{circled numbers} Dirty Vellum Daters by Roben-Marie Designs, retired
Physical:
Stamps: {books} {harper's ruler} {herringbone} {stars} Studio Calico
{newsprint} Glitz Designs
{hieroglyphics} Judi-Kins
{2 0 1 1} Martha Stewart
Ink: pumice stone, Tim Holtz's Distress Ink by Ranger Industries
Cardstock: white, Georgia-Pacific
Other: black & white baker's twine, Divine Twine by Whisker Graphics; Corner Chomper, We R Memory Keepers

LinkWithin

Related Posts with Thumbnails