How are you this fine Friday? Exceedingly well I hope!
My mom was always big on sending birthday cards to family. A few years ago I took over and began making handmade cards for my family (and friends although I was failed miserably last year...crash and burn style).
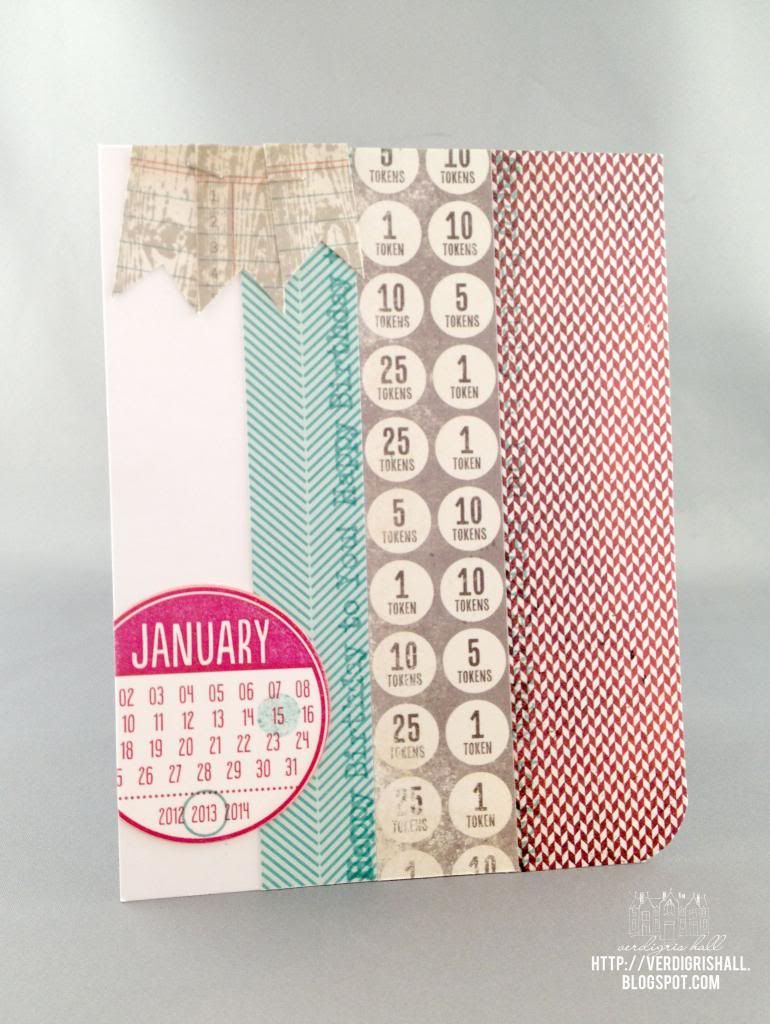
I am here today to share a masculine birthday card. The first in a series I will be making this year. Perhaps you remember the cards I made a couple of years ago which you can see again HERE (more than likely not)...I am using a similar philosophy this year as well.
I am a
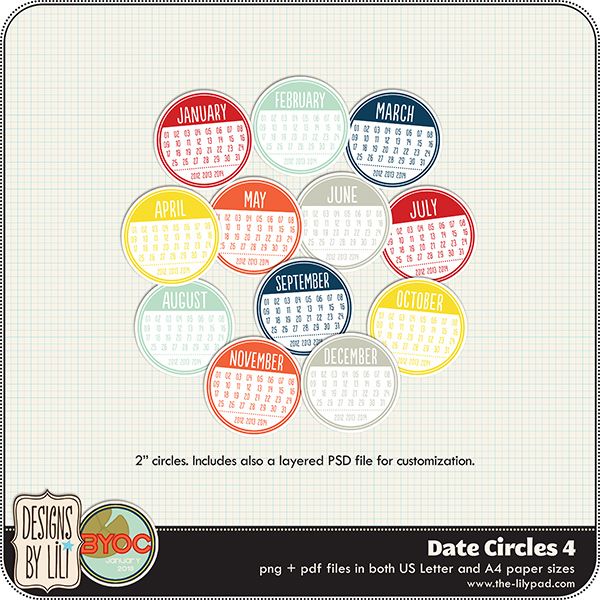
Meet Date Circles 4 (Hint, hint: they and everything at The Lilypad (one of my favorite digital shops) are on sale this weekend--January 18-January 21, 2013):
I placed the images of all the months I needed onto a Word document and printed them out on a single sheet of white cardstock. Our new printer is a little off in color (it must need adjustment) as the orange came out red and the red a little more of a pink-red, but regardless they are still cool.
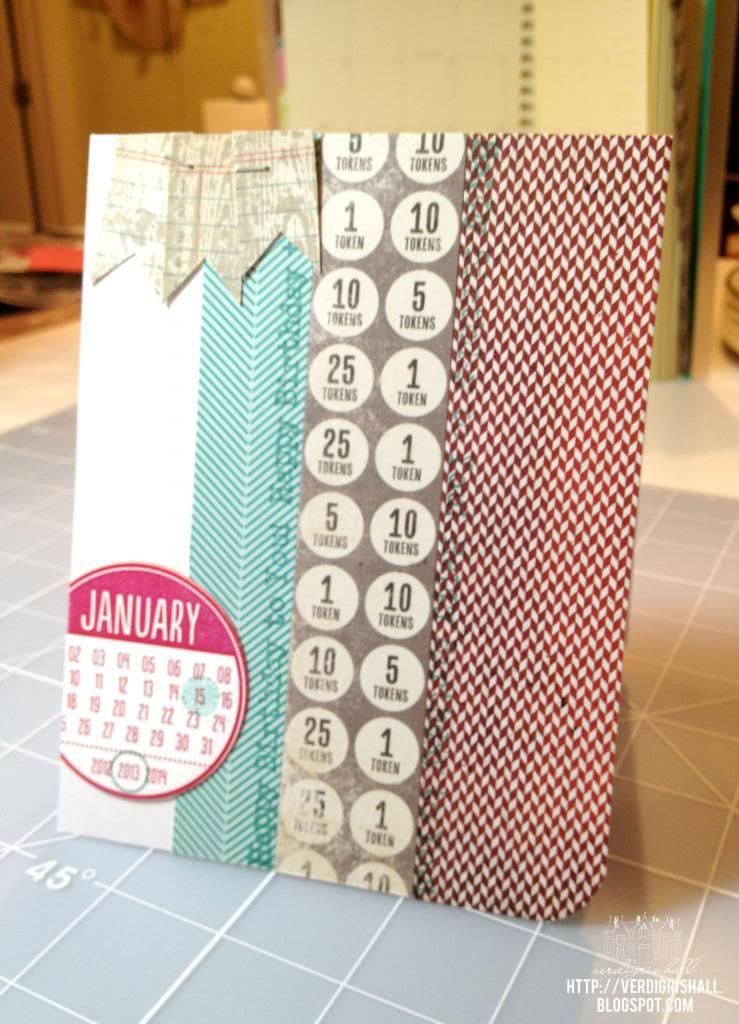
I began with a white cardbase (my favorite) to begin the card. I already had Lawn Fawn's Dewey Decimal petite paper pad (6x6 paper) out from another card (boy, this is has become a go-to paper collection) and I thought the aqua/teal would be great with the red January circle. I also picked out a piece of patterned paper with numbers and circles from My Mind's Eye Miss Caroline collection (Dilly Dally "Celebrate" Token) in a wonderful grey...red, grey, white and aqua/teal a winning combination. The red herringbone piece of paper came from Basic Grey's Clippings collection 6x6 paper pad. All of these papers are cut into strips of various widths for interest and adhered to the cardbase.
I wanted to use the "happy birthday to you" from Studio Calico/Hero Arts stamp set Calico Borders and I also wanted to bring in more of the teal color. I found to my delight that Tim Holtz Distress Ink by Ranger in evergreen bough is a perfect match. I stamped it once on the teal strip and also on the red strip (it is hard to see but there subtly).
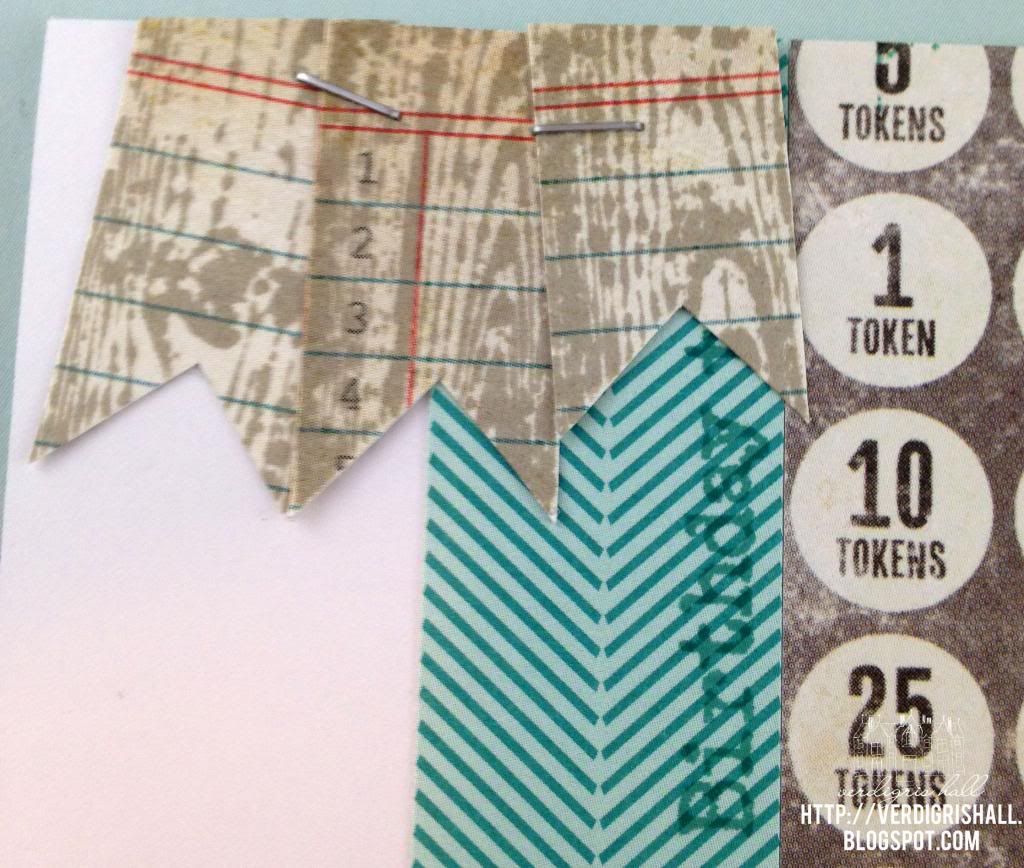
Using the reverse side of the My Mind's Eye Token paper (a cool ledger that coincidentally had the red and teal color too!), I stamped the woodgrain banners (woodgrain + banner = awesome) from the "Baby" stamp set from My Mind's Eye Miss Caroline Howdy Doody in wet cement Hero Arts Shadow Ink Mid-Tone, cut them out and adhered them together with my handy dandy Tim Holtz Tiny Attacher and then adhered them to the top left border of the card.
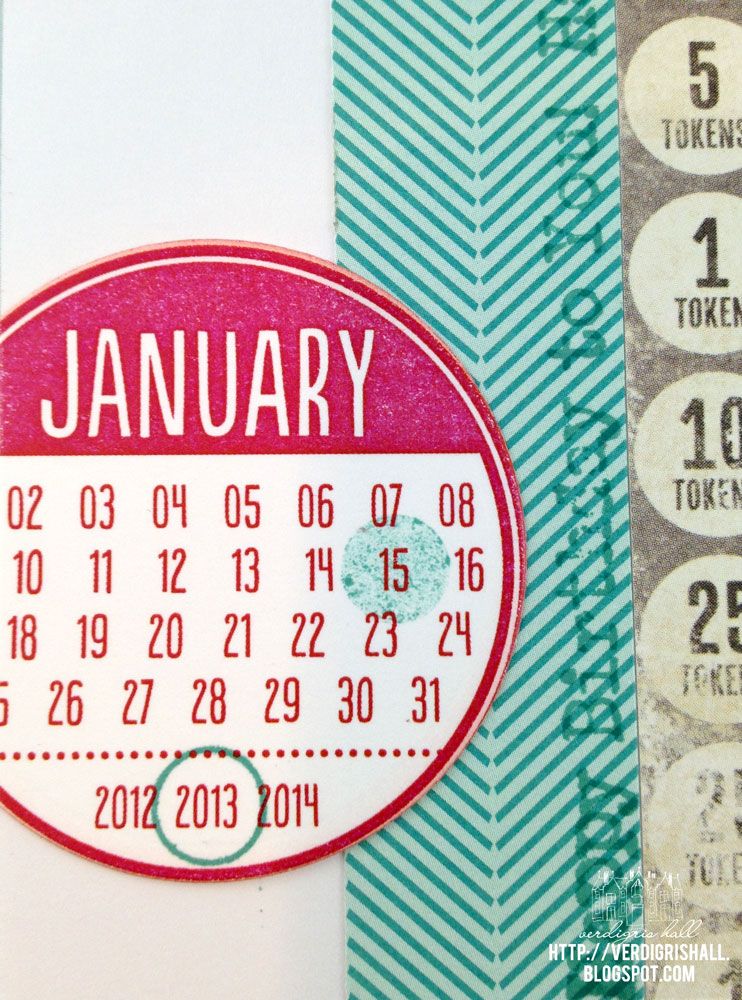
Lastly, I used the outline circle and solid circle from Cocoa Daisy's Day in the Life: Pick a Date Calendar stamp to highlight the day and year in the evergreen bough ink on red January calendar and then adhered it all to the card (making sure to cut off the overhang of the January circle) and I rounded the bottom right hand corner of the card. By the way, check out Cocoa Daisy's stamps because they are pretty fantastic.
And there you have it, a personalized hybrid card for a guy (picture of the card in its natural habitat or place of origin aka my studio).
Thank you so much for taking the time to visit!
Have a brilliant weekend,
Shay.
Happy Birthday to You Birthday Card
Supplies:
Digital: Date Circles 4, Designs by Lili at The Lilypad
Stamps: Calico Borders, Studio Calico/Hero Arts; Baby from Miss Caroline collection, My Mind's Eye; A Day in the Life: Pick a Date Calendar stamp, Cocoa Daisy
Ink: evergreen bough, Tim Holtz Distress Ink by Ranger; wet cement, Hero Arts Shadow Ink Mid-Tone
Cardstock: solar white, Neenah Papers; white, Georgia Pacific
Patterned Paper: Dewey Decimal Petite Paper Pad, Lawn Fawn; Clippings 6x6 Paper Pad, Basic Grey; Token from Dilly Dally "Celebrate" Miss Caroline collection, My Mind's Eye
Other: Tiny Attacher, Tim Holtz; Crop-A-Dile Corner Chomper, We R Memory Keepers
1 comment :
Circles :) This is a cute date stamp and perfect for your cards - I know how you like to add the dates to them. Love the colors (even the pink-red).
Post a Comment