Happy, happy Monday! I have a couple of cards to share with you today using a busy craft girl's best friend: kits. I used Studio Calico's Central High Card Kit, their first card kit from back in September of 2012 along with some letter stickers from the Central High Scrapbook Kit. The only other item I added from my stash was a birthday die I recently got from Papertrey Ink that I was dying to try out.
I have found that Studio Calico creates kits that are great for creating cards for any gender and the Central High Card Kit was a perfect example. They always include an exclusive 6x6 paper pad of patterned paper that is in a word, awesome. No, sadly I was not paid by Studio Calico to give this endorsement...weirdly I just promote products I pay for and love. For even more ease I didn't ink up anything. Yes, that's right no stamps for these suckers.
I would rate these cards as Easy Going.
Card No. 1
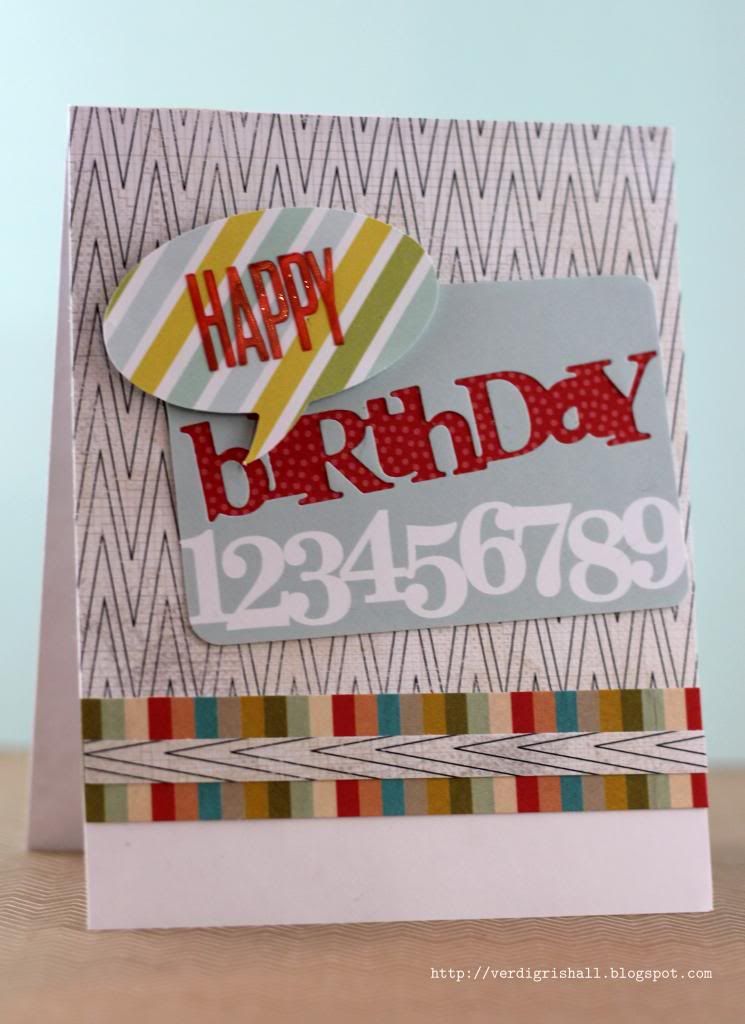
From the number file folder die cut found in the kit I die cut the birthday from it. I then backed the die cut with the red patterned paper. I made sure to add back some of the insides of the letters. To cover up a change of mind with some of the letter stickers that caused some paper tearing (I hate when that happens!), I added the speech bubble die cut and placed the letters on that. I adhered it to the file folder die cut with dimensional adhesive. This was all adhered to a white cardstock base covered with some of the chevron papers and striped patterned paper.


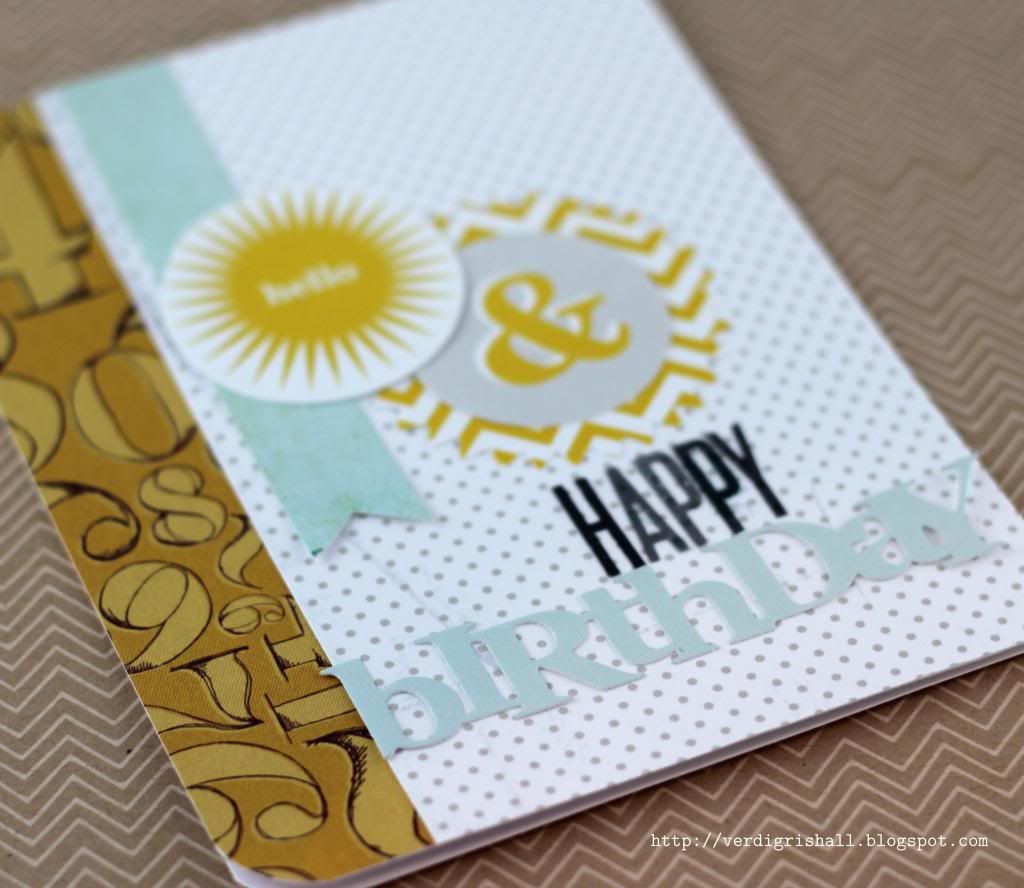
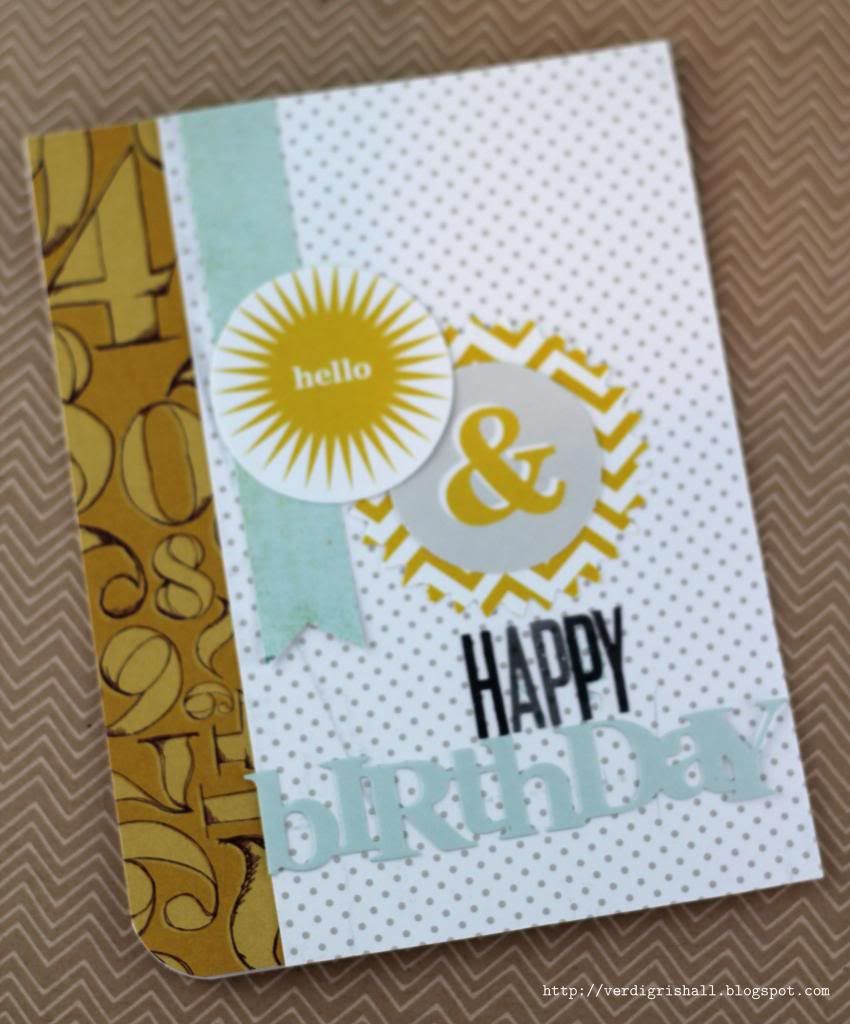
Card No. 2
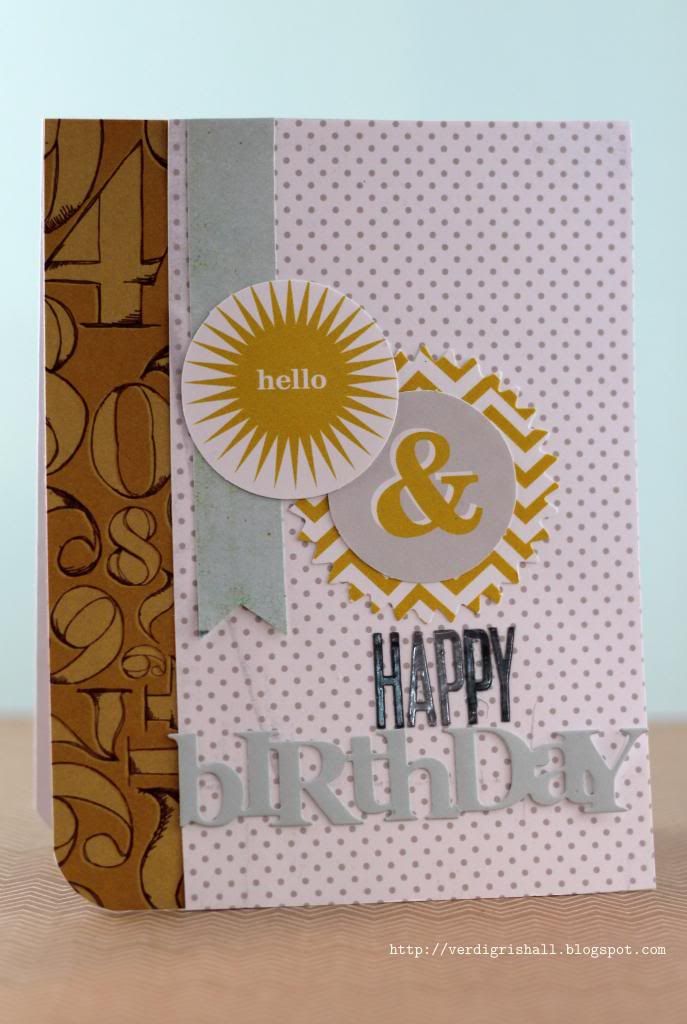
I had the positive birthday die from the previous card I wished to use. I loved the yellows featured on a lot of the die cuts included in the card kit. I decided to use the yellow with the soft morning sky blue and also include some grey (grey is always good, right?). I cut out a banner strip from a patterned paper with the same color as the birthday die and adhered it to the grey dot paper that I adhered to a white card base along with the mustard number paper (big love and perfect for birthdays). Then I added a few layers of the die cuts. I added the letter stickers (the ones I peeled off the previous card) to spell out happy and then adhered the birthday die. Last I rounded the left bottom corner.
MOMM Tips:
MOMM Tip No. 1: Use kits. There are some really incredible card kits out there along with scrapbook kits that take the guess work out of choosing products that coordinate and include the latest and greatest products. Along with Studio Calico I really like Simon Says Stamp's monthly card kit.
MOMM Tip No 2: Keep it clean. You don't have to pull out your inks every time to create a card. It is okay to give your stamp collection a little breather. They really won't revolt and come at you when you sleep.
I hope this has inspired you to make some easy and fun manly cards.
Happy creating,
Shay.
P.S. You will find my Papertrey Ink March 2013 Blog Hop today as well.
Supplies:
Kits: Central High Card Kit and Central High Scrapbook Kit, Studio Calico
Other: Wonderful Words: Birthday die, Papertrey Ink; Cuttlebug, Provo Craft; dimensional adhesive; Crop-A-Dile Corner Chomper, We R Memory Keepers
No comments :
Post a Comment